- Prompt
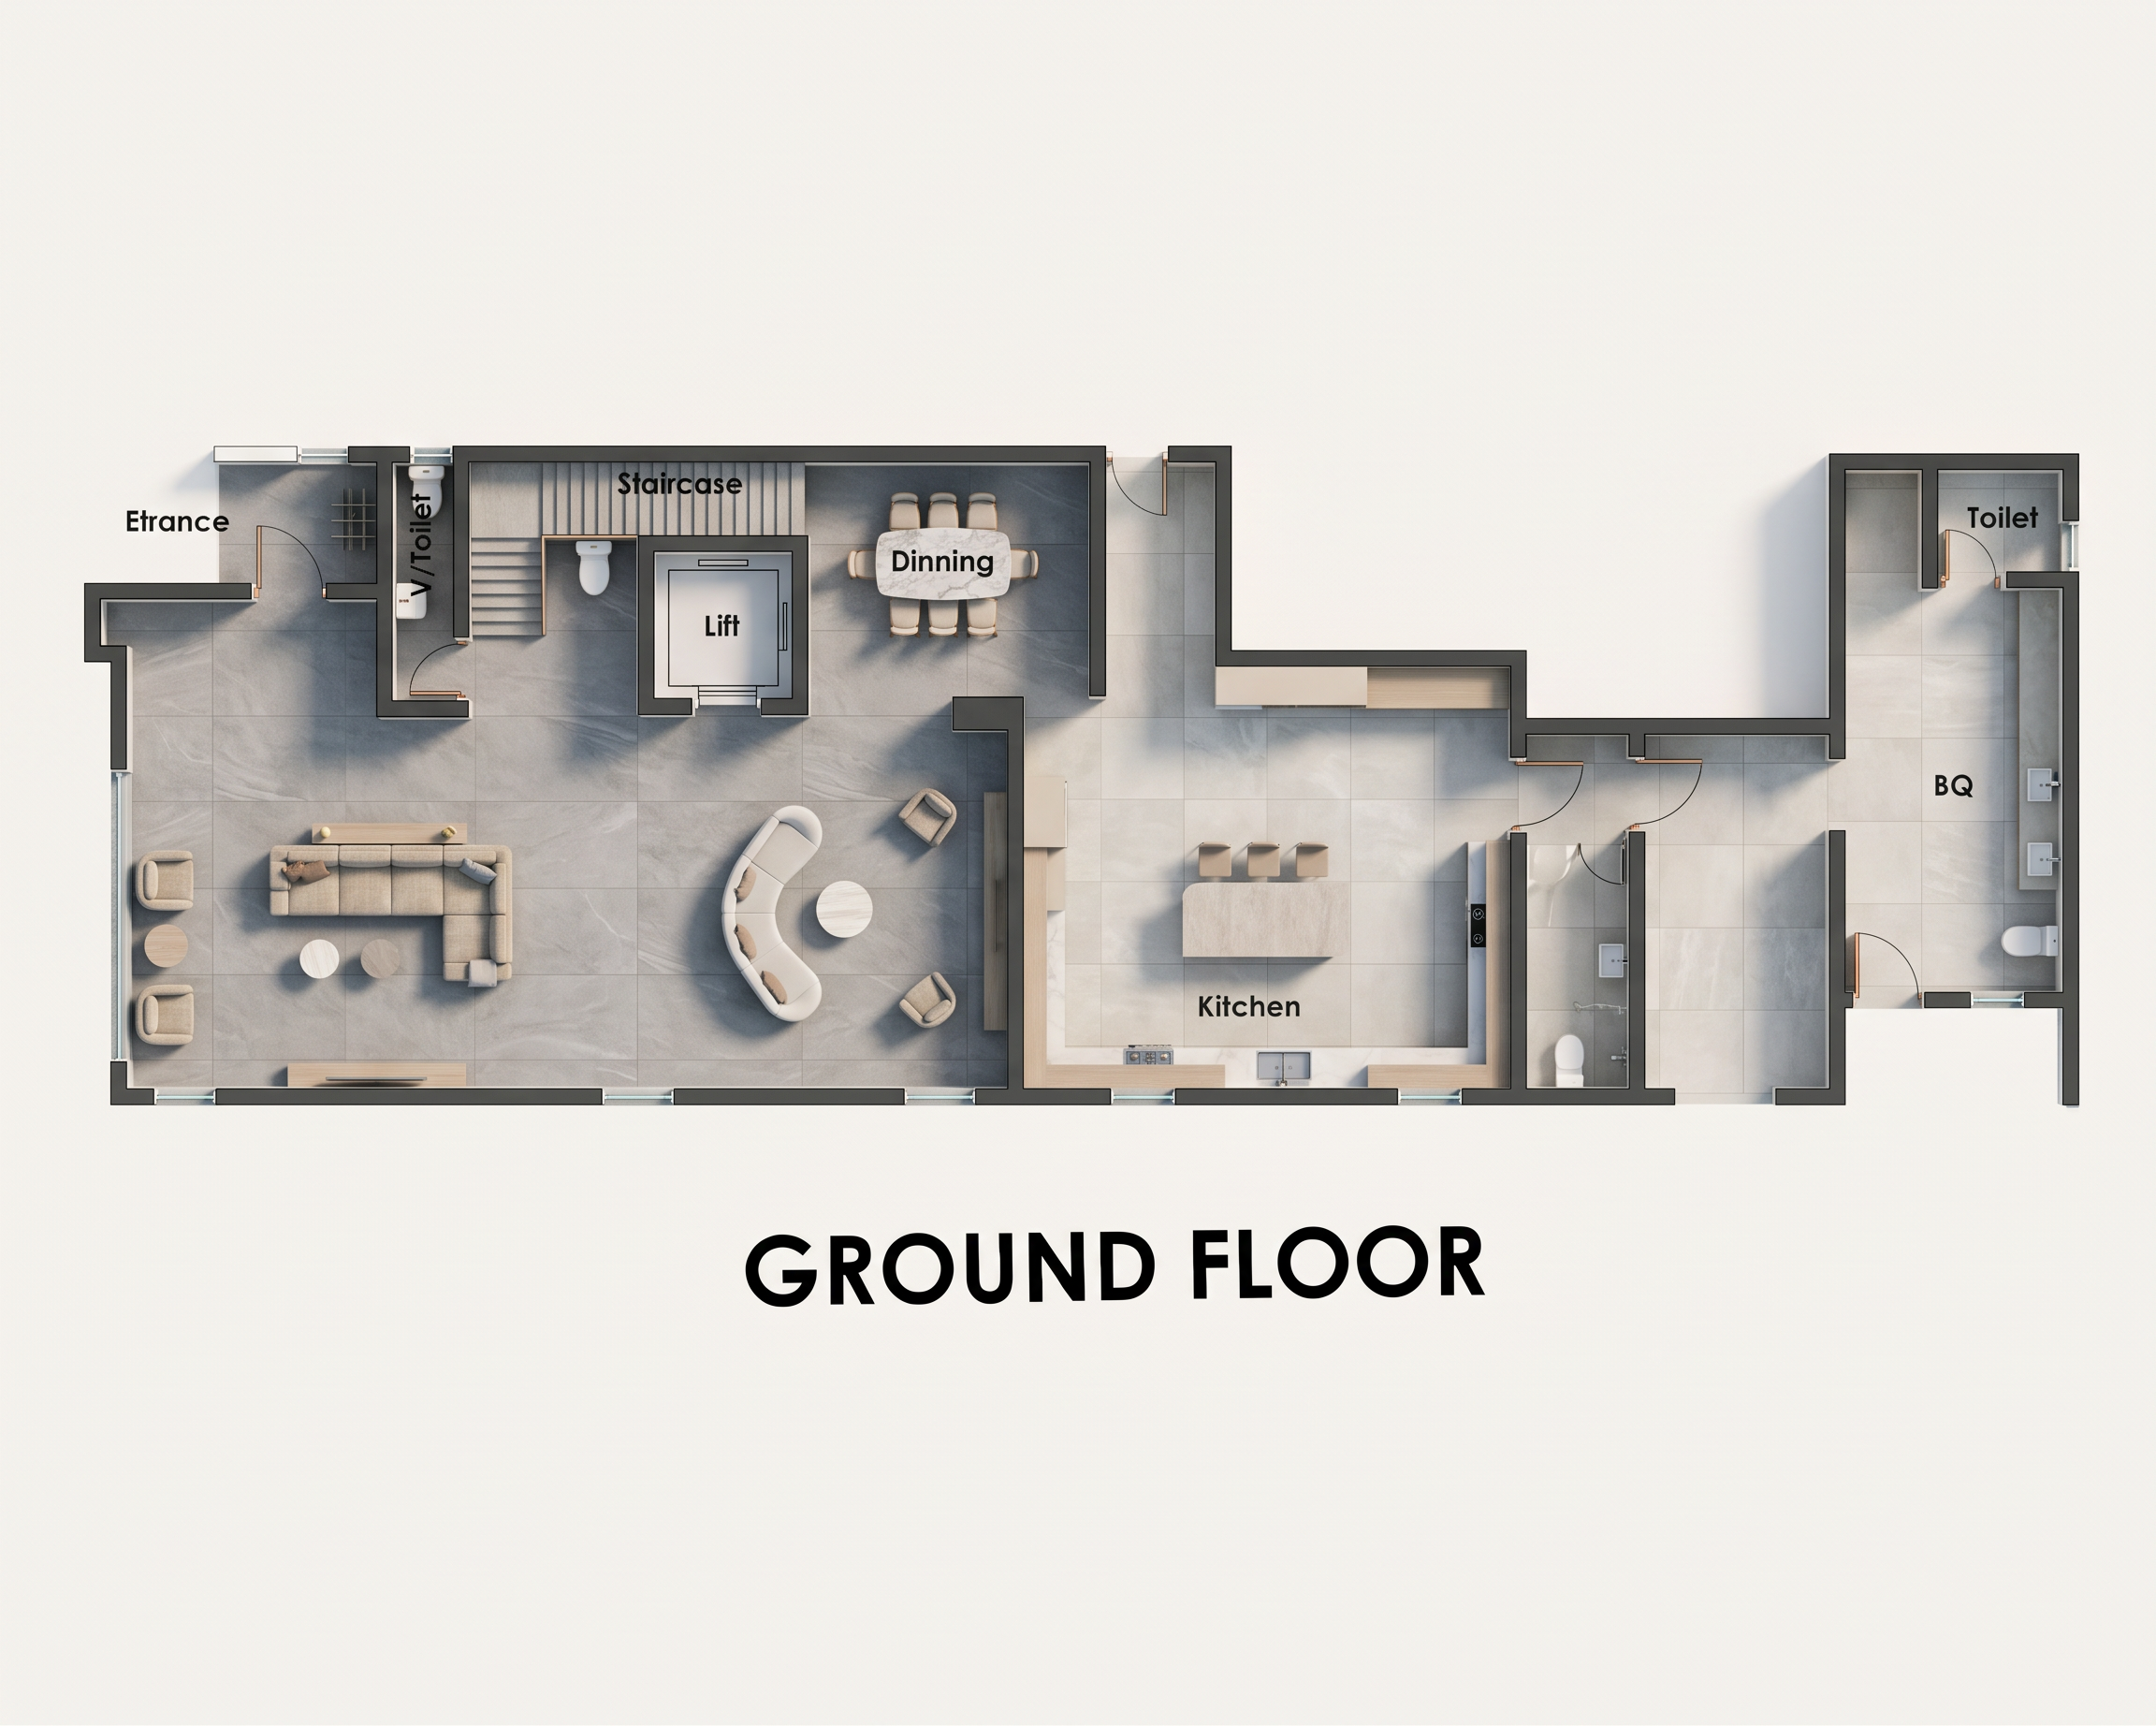
- Transform the provided ground floor architectural floor plan into a highly photorealistic 2D rendered floor plan in a strict top-down orthographic view (90° overhead). Maintain the exact original architectural layout, wall positions, room dimensions, openings, doors, windows, staircase, lift, V/toilet, kitchen, dining area, living room, and BQ. Do not alter the building structure or furniture arrangement.
1. Living Room
Install grey large format tiles flooring with subtle of natural stone textures. in the living room.
Retain the original L-shaped sofa, two single chairs, circular coffee table arrangement, and existing furniture positions.
Use modern, elegant furniture with realistic fabric textures in beige, cream, and soft grey.
Add subtle shadows beneath the furniture for depth and realism.
2. Dining Area
Maintain the original dining table and six dining chairs in their exact positions.
Use elegant modern dining furniture with realistic marble textures.
Ensure the dining area blends naturally with the living room design.
3. Kitchen
Use large-format cream porcelain tiles with subtle natural stone textures.
Retain the original kitchen island or counter and all existing furniture positions.
Apply a modern minimalist kitchen finish with white, beige, and light wood tones.
Use realistic material textures and clean, refined detailing.
4. Staircase, Lift and V/Toilet
Maintain the exact staircase configuration, lift location, and V/toilet layout.
Use light grey tiles for the circulation areas.
Represent the staircase treads clearly with realistic material finishes.
Keep all wall boundaries and partitions unchanged.
5. BQ and Toilet
Retain the original BQ layout and toilet position.
Use cream porcelain tiles for the BQ floor and toilet floor.
Apply clean, contemporary finishes while preserving the existing architectural divisions.
6. Architectural Detailing
Preserve all original wall thicknesses, structural columns, openings, and partitions.
Render the walls in a combination of white and subtle light grey.
Maintain the original entrance position and external access points.
Keep the original floor plan proportions and all room labels, including GROUND FLOOR, Living Room, Dining, Kitchen, Staircase, Lift, V/Toilet, BQ, Toilet, and Entrance.
Make the room labels clear, legible, and professionally presented.
7. Rendering Quality
Ultra-realistic 2D architectural floor plan visualization, using vray6
Strict 90-degree top-down orthographic camera.
High-resolution output, 4K quality or higher.
Realistic material textures, accurate furniture scale, soft ambient occlusion, and subtle contact shadows.
Professional architectural presentation with crisp wall outlines, clean edges, balanced lighting, and excellent image clarity.
Neutral colour palette: light oak, beige, cream, white, and light grey.
White background with a clean, uncluttered presentation.
IMPORTANT RESTRICTIONS: Use the uploaded floor plan as the exact reference. Do not redesign the layout, move furniture, add rooms, remove walls, change the staircase, relocate the lift, modify the kitchen, or change the BQ configuration. Do not introduce perspective distortion, 3D camera angles, or unnecessary decorative elements. The final output must look like a professional, photorealistic 2D rendered architectural floor plan suitable for a client presentation.
Use grey tiles for the all the floor
Stick to my instructions
- Created
- October 14, 2026