- Prompt
- Create a high-end, photorealistic architectural interior render based strictly on the provided reference image.
CRITICAL — PRESERVE THE ORIGINAL IMAGE EXACTLY
Do not change the image proportions, aspect ratio, dimensions, room geometry, architectural elements, layout, furniture placement, scale, camera position, camera angle, camera height, perspective, framing, or composition.
Do not redesign the space. Do not move, resize, remove, or add architectural elements.
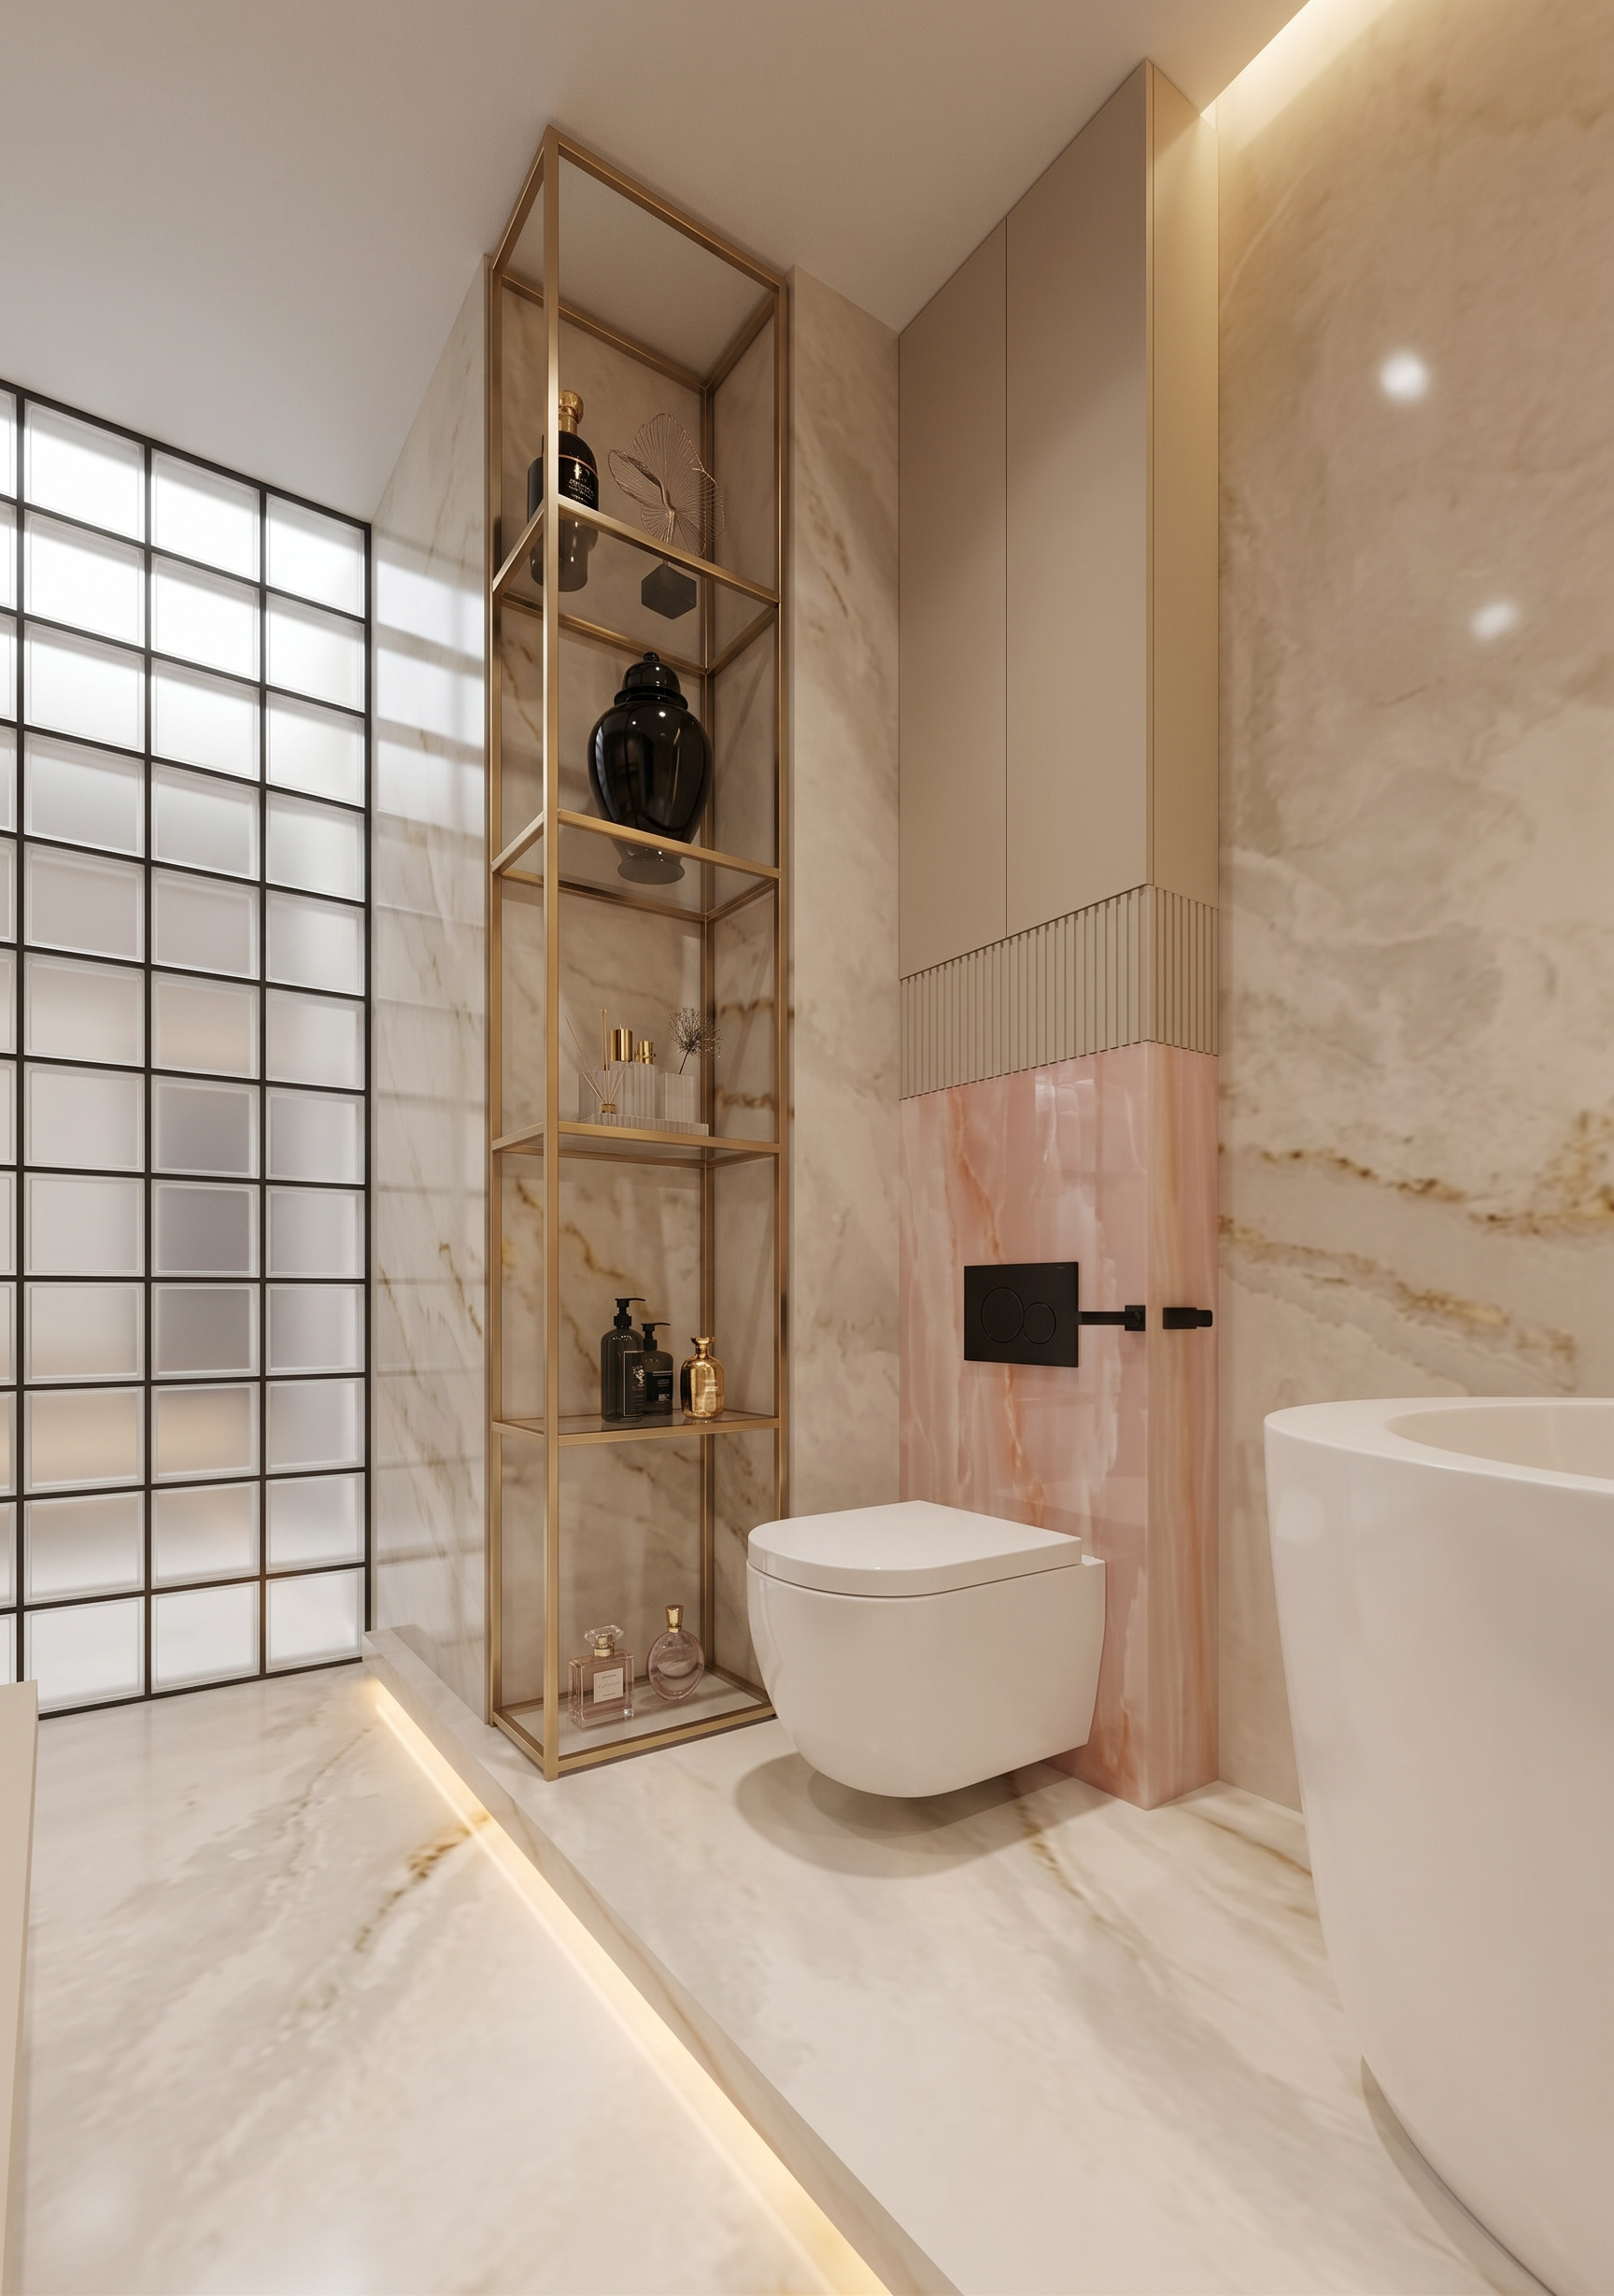
The reference image shows the same bathroom as Reference 1, simply from a different camera angle. Use Reference 1 specifically as the material and design reference, while preserving the exact geometry and camera view of the current image.
Materials
• Cover the floor and walls with the same light warm beige marble shown in Reference 1.
• The curved/convex wall section behind the toilet should be finished in the same luxurious pink onyx used for the panel behind the bathtub in Reference 1.
• Preserve the exact curved geometry of this element.
• The pink onyx should have realistic natural veining, subtle translucency and depth.
Built-in cabinetry
• On the pink onyx wall, create the closed beige built-in cabinet shown in the reference.
• Preserve its exact proportions and geometry.
• Include the ribbed/fluted section, approximately 25 cm high, exactly as indicated in the reference.
• Behind/next to this element, there is another tall built-in cabinet extending from floor to ceiling. Keep its exact dimensions and position.
• The areas marked in black around the toilet are open shelving units made of gold metal with transparent glass shelves.
• Make the gold refined and luxurious, matching the gold details from Reference 1.
• Add tasteful, minimal luxury bathroom decor to the open shelves: a few elegant decorative objects, small sculptural pieces, refined perfume/bottle-like objects and subtle accessories. Keep the styling sophisticated and uncluttered.
Toilet and bathtub
• Keep the toilet exactly where it is in the reference image and do not alter its shape or proportions.
• The small visible portion of the bathtub on the right must remain exactly in its current position and geometry, using the same white bathtub and pink-onxy / beige-marble material palette established in Reference 1.
• The toilet, built-in cabinetry and the visible section of the bathtub are all positioned on the same low raised platform/podium.
• The podium should be finished in the same light warm beige marble.
• Add a subtle warm LED strip underneath the entire podium, creating a refined floating effect.
Glass-block partition
• The black grid-like element on the left is NOT a black wall or solid partition.
• It is a partition made of frosted/translucent glass blocks / textured glass panels with a dark structural grid.
• Preserve its exact shape, position and proportions.
• Through the translucent glass, create a subtle impression of natural daylight coming from behind the partition.
• Behind this partition is an open atrium, so the background should feel naturally illuminated by soft daylight.
• The atrium should remain subtle and partially obscured; do not make it visually dominant.
Lighting and atmosphere
Create a warm, luxurious, sophisticated atmosphere consistent with Reference 1.
Use:
• soft natural daylight from the atrium,
• warm indirect architectural lighting,
• subtle LED lighting beneath the podium,
• realistic reflections on the marble,
• realistic translucency of the pink onyx,
• refined reflections on the gold,
• soft shadows and physically accurate global illumination.
The overall result should feel expensive, elegant, timeless and highly curated, like a premium luxury hotel or high-end private residence.
- Created
- October 5, 2026