- Prompt
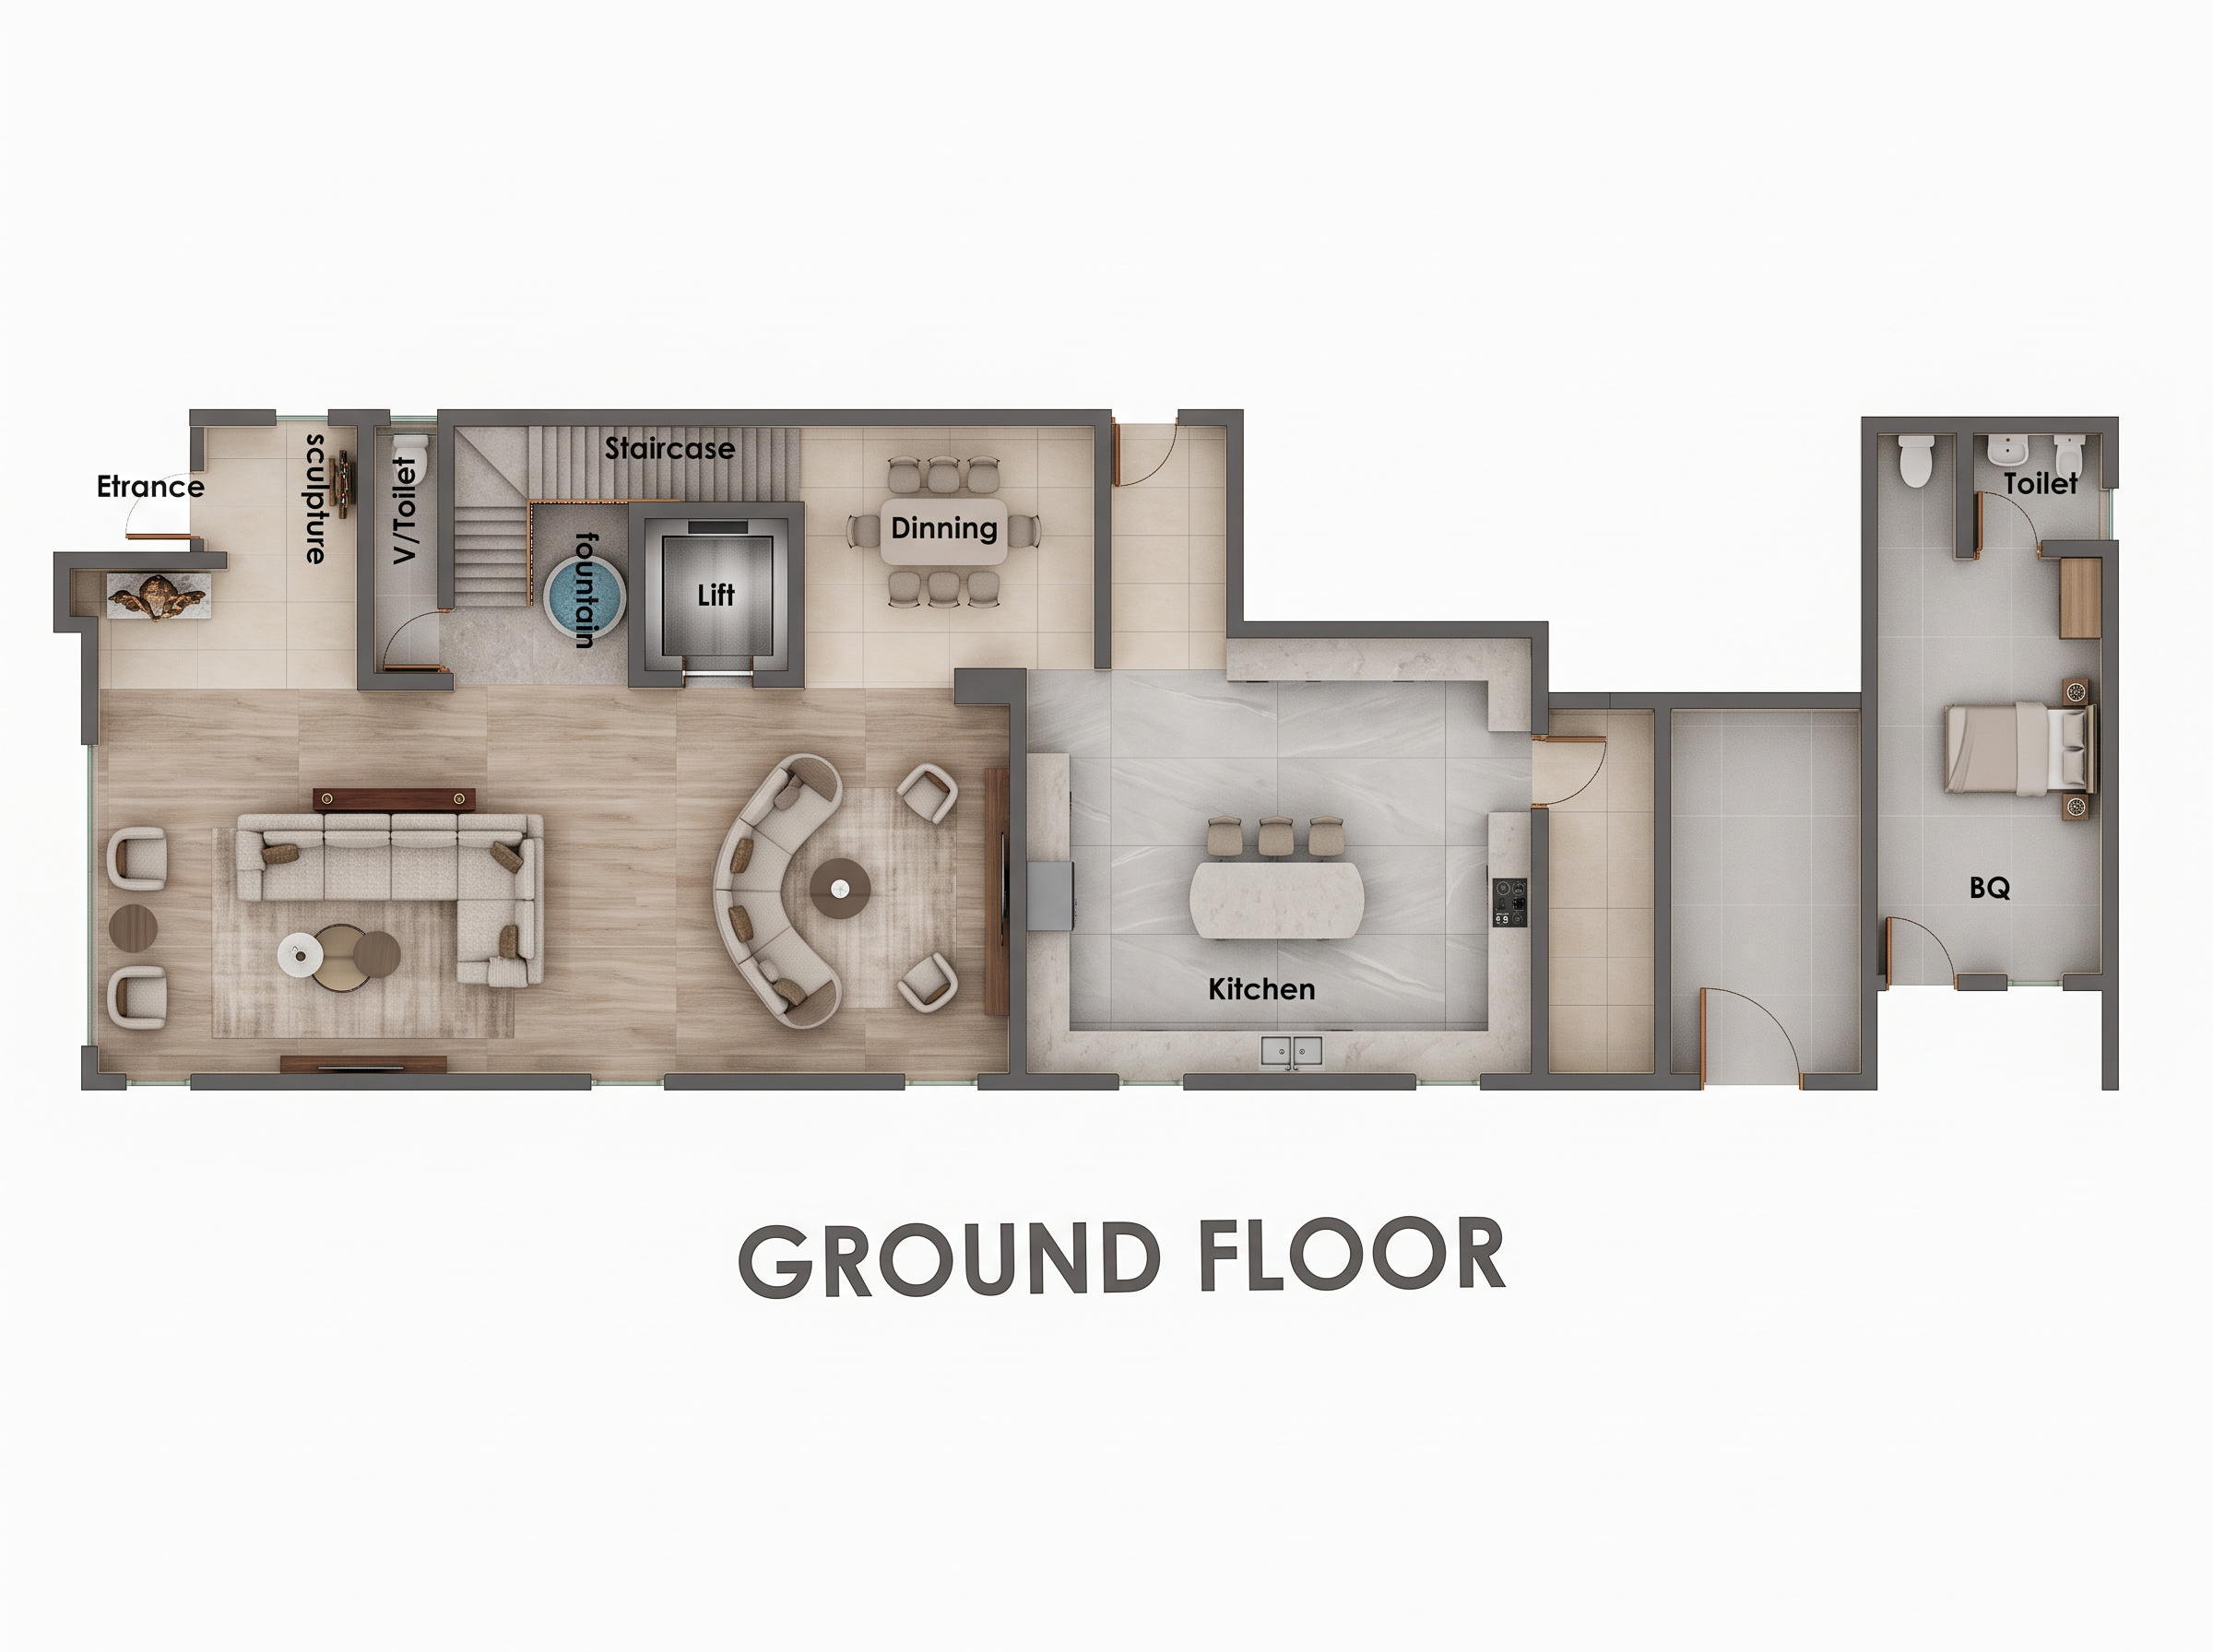
- Transform the provided ground-floor architectural floor plan sketch into a high-quality, photorealistic 2D rendered floor plan, viewed directly from above in a perfectly orthographic top view (90-degree bird’s-eye view)
IMPORTANT: Maintain the exact original architectural layout, wall positions, room dimensions and proportions, door and window openings, circulation paths, staircase, lift, V/Toilet, kitchen, dining area, entrance, sculpture area, and BQ with toilet. Do not redesign, relocate, add, or remove any architectural elements or furniture.
Floor finishes:
• Living room and main lounge: premium tiling flooring with natural grain and a warm, sophisticated finish.
• Dining area: light beige or cream porcelain tiles.
• Kitchen: large-format light grey porcelain tiles, approximately 600 × 1200 mm, with subtle natural stone texture.
• Entrance and circulation areas: light beige or warm grey porcelain tiles.
• Staircase and lift lobby: neutral grey stone or porcelain finish.
• BQ and toilet: light grey anti-slip floor tiles.
• Maintain clear visual differentiation between all flooring materials.
•
Furniture and interior styling: Render the existing L-shaped living-room sofa, two single chairs, coffee tables, curved sofa arrangement, circular tables, dining table with six chairs, kitchen island or worktop with three stools, and all other furniture exactly where shown in the original plan. Use contemporary luxury furniture in neutral beige, cream, soft grey and warm wood tones.
Walls and architectural details: Render all walls with clean off-white finishes and realistic dark grey wall thicknesses. Clearly define structural walls, internal partitions, openings, doors, windows, staircase treads, lift enclosure, kitchen counters, bathroom fixtures and sanitary fittings. Preserve the original room labels and their positions.
Rendering quality: Use realistic material textures, subtle ambient occlusion, soft natural shadows, balanced lighting, crisp furniture edges and refined architectural presentation. Apply realistic wood grain, porcelain tile joints, fabric textures and stone finishes. Ensure the entire plan is clean, sharp, well-lit and easy to read.
Composition and output: Maintain the original horizontal orientation and complete ground-floor footprint. Use a pure top-down orthographic camera with no perspective distortion, no tilted view, no 3D isometric angle, no cropped rooms and no changes to the original geometry. Keep the background plain white and retain the “GROUND FLOOR” title beneath the drawing.
Final output: An ultra-clean, high-resolution, photorealistic 2D architectural floor plan suitable for a professional interior design presentation, client approval and architectural portfolio.
Negative prompt: Do not change the layout, wall geometry, room proportions, furniture arrangement, number of chairs, kitchen position, staircase, lift, BQ, toilet, or entrance. No new furniture, no missing elements, no exaggerated textures, no perspective view, no 3D walls, no ceiling, no people, no unnecessary decorations, no blurry lines and no illegible room labels.
- Created
- October 15, 2026