Skip to content
Render tools
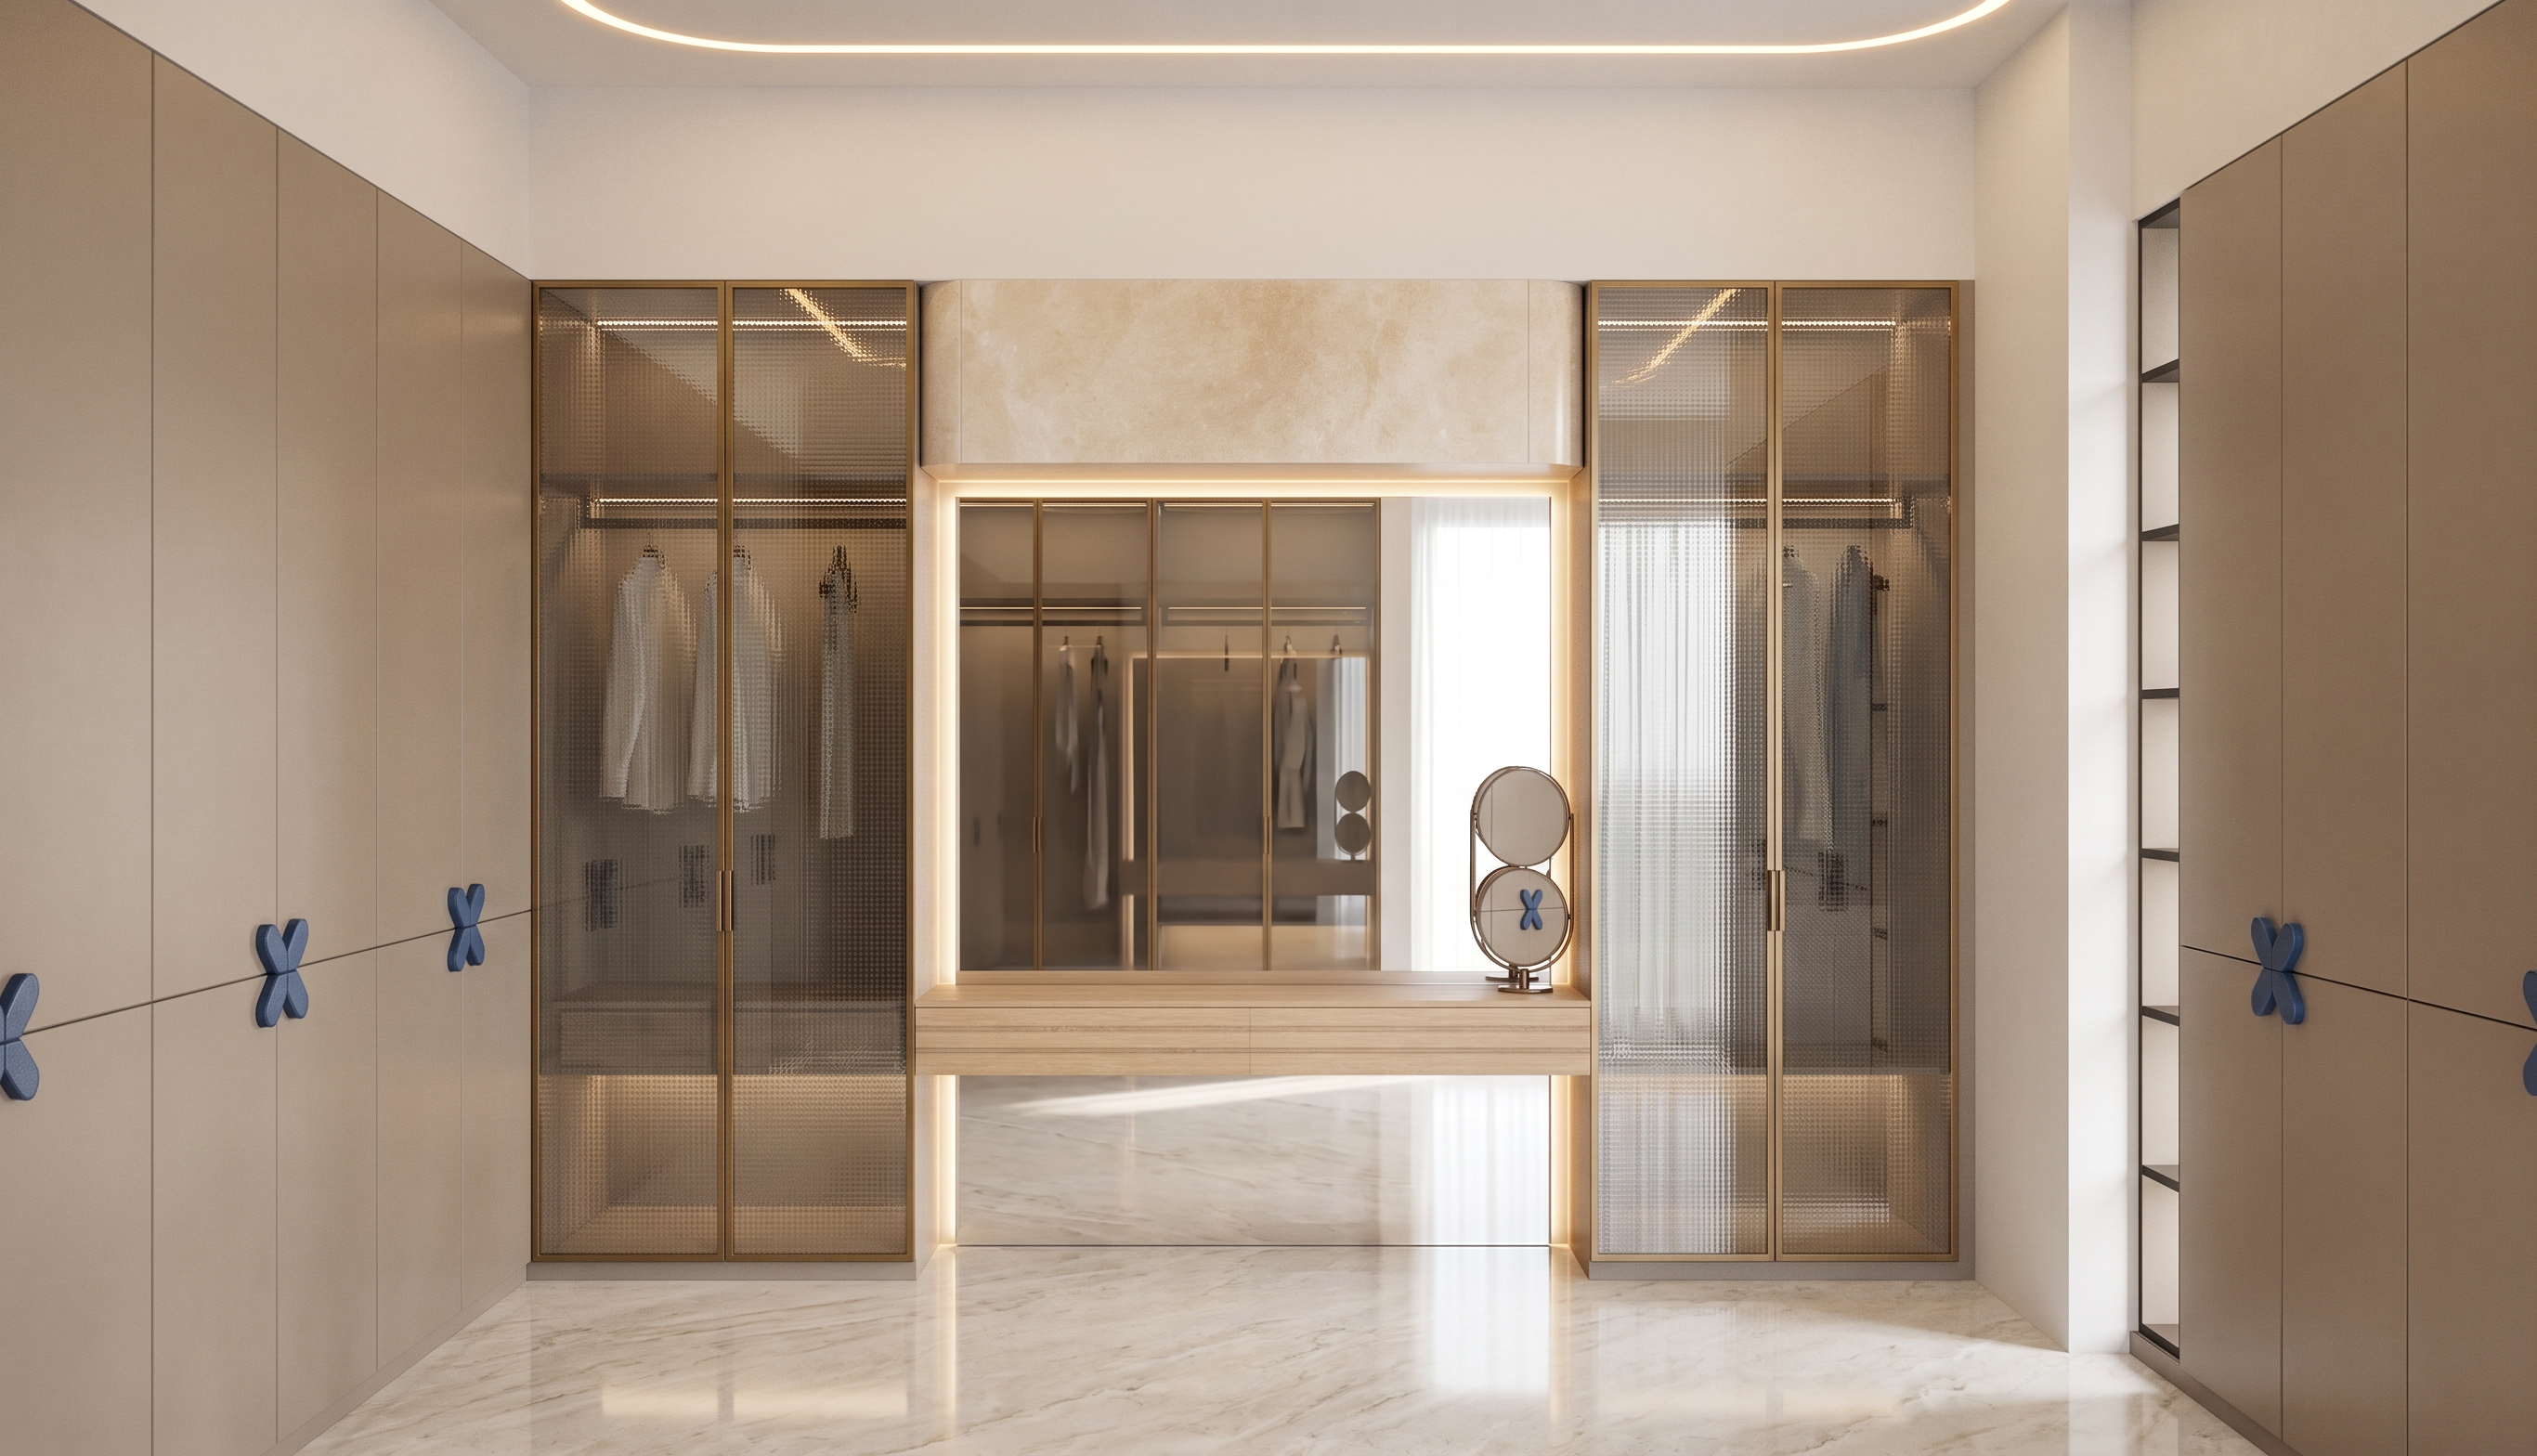
Create an ultra-realistic, high-end architectural 3D render of the exact dressing room shown in the reference image.

๐Ÿšจ EXTREMELY IMPORTANT โ€” DO NOT CHANGE THE MODEL

The reference image is the exact design and geometry that must be rendered.

DO NOT CHANGE THE CAMERA ANGLE.
DO NOT CHANGE THE CAMERA POSITION.
DO NOT CHANGE THE VIEWPOINT OR PERSPECTIVE.
DO NOT CHANGE THE DESIGN.
DO NOT CHANGE ANY DIMENSIONS.
DO NOT CHANGE SCALE OR PROPORTIONS.
DO NOT MOVE ANY ELEMENT.
DO NOT RESIZE OR RESHAPE ANY ELEMENT.
DO NOT ADD ANY NEW ARCHITECTURAL ELEMENTS.
DO NOT REMOVE ANY EXISTING ELEMENTS.
DO NOT CHANGE THE NUMBER, SIZE, OR POSITION OF THE WARDROBE PANELS.
DO NOT change the position or proportions of the central dressing unit.
DO NOT alter the ceiling, walls, flooring, shelves, niches, or openings.
Keep the exact composition and framing of the reference image.

The final image must look like the exact same 3D model photographed from the exact same camera, with only the materials, lighting, textures, reflections and realism upgraded.

MATERIALS & FINISHES

Side wardrobes:

Use a sophisticated warm taupe/beige matte laminate.
Preserve all existing panel divisions and horizontal alignment.
Keep the existing sculptural bow-shaped handles.
Handles should be a deep elegant blue, with realistic painted/brushed finish.

Glass wardrobes beside the dressing unit:

Keep the exact existing dimensions and framing.
Use the supplied small-pattern textured/faceted glass appearance.
Glass should be translucent and realistically reflective, while still allowing subtle visibility through it.
Keep the thin warm brass/gold frame.
Keep the existing vertical handles and make them blue only if they are already specified as blue in the model; otherwise preserve their original design/finish.

Central dressing unit:

Keep the exact existing wooden counter and geometry.
Render the wood with a refined natural light-oak/walnut-grain appearance matching the reference.
Above it, retain the large mirror exactly where it exists.
Give the mirror realistic reflections and subtle warm illumination.
Keep the existing round decorative object/accessory inside the dressing area exactly in place.

Upper central panel:

Finish it in a subtle warm ivory/cream stone or marble texture with delicate natural variation.
Keep its exact shape, size and position.
FLOOR & WALLS
Replace the basic grey floor appearance with a premium light ivory/white marble floor.
Add subtle natural grey/beige veining.
Give the marble realistic glossy reflections.
Walls should be a warm off-white/very light beige.
Maintain all existing wall geometry and openings exactly.
CEILING & LIGHTING
Preserve the existing recessed/cove ceiling design exactly.
Add soft 3000K warm-white LED lighting inside the existing ceiling recess.
Add subtle warm illumination around the dressing mirror if the geometry permits.
Use realistic indirect lighting and soft shadows.
Introduce natural daylight into the room without changing any openings.
Make the overall room bright, warm and naturally illuminated, not dark or overly dramatic.
REALISM

Render as a high-end luxury interior photograph with:

Photorealistic PBR materials
Realistic glass refraction and reflections
Realistic marble texture and subtle veining
Detailed wood grain
Accurate metal reflections
Soft global illumination
Natural ambient occlusion
Physically accurate shadows
Realistic light bounce
High-resolution textures
Clean architectural detailing
Natural exposure and white balance
Sharp but realistic material definition
FINAL INSTRUCTION

PRIORITY ORDER: 1) EXACT CAMERA ANGLE โ†’ 2) EXACT DESIGN โ†’ 3) EXACT DIMENSIONS/SCALE โ†’ 4) EXACT GEOMETRY โ†’ 5) MATERIALS โ†’ 6) LIGHTING โ†’ 7) PHOTOREALISM.

Do not interpret, redesign or improve the architecture. Do not make creative changes to the model. Render the exact reference faithfully and only convert the basic model into a premium photorealistic interior render.

Create renders like this

Turn any photo, sketch, or floor plan into a photoreal render in seconds.