- Prompt
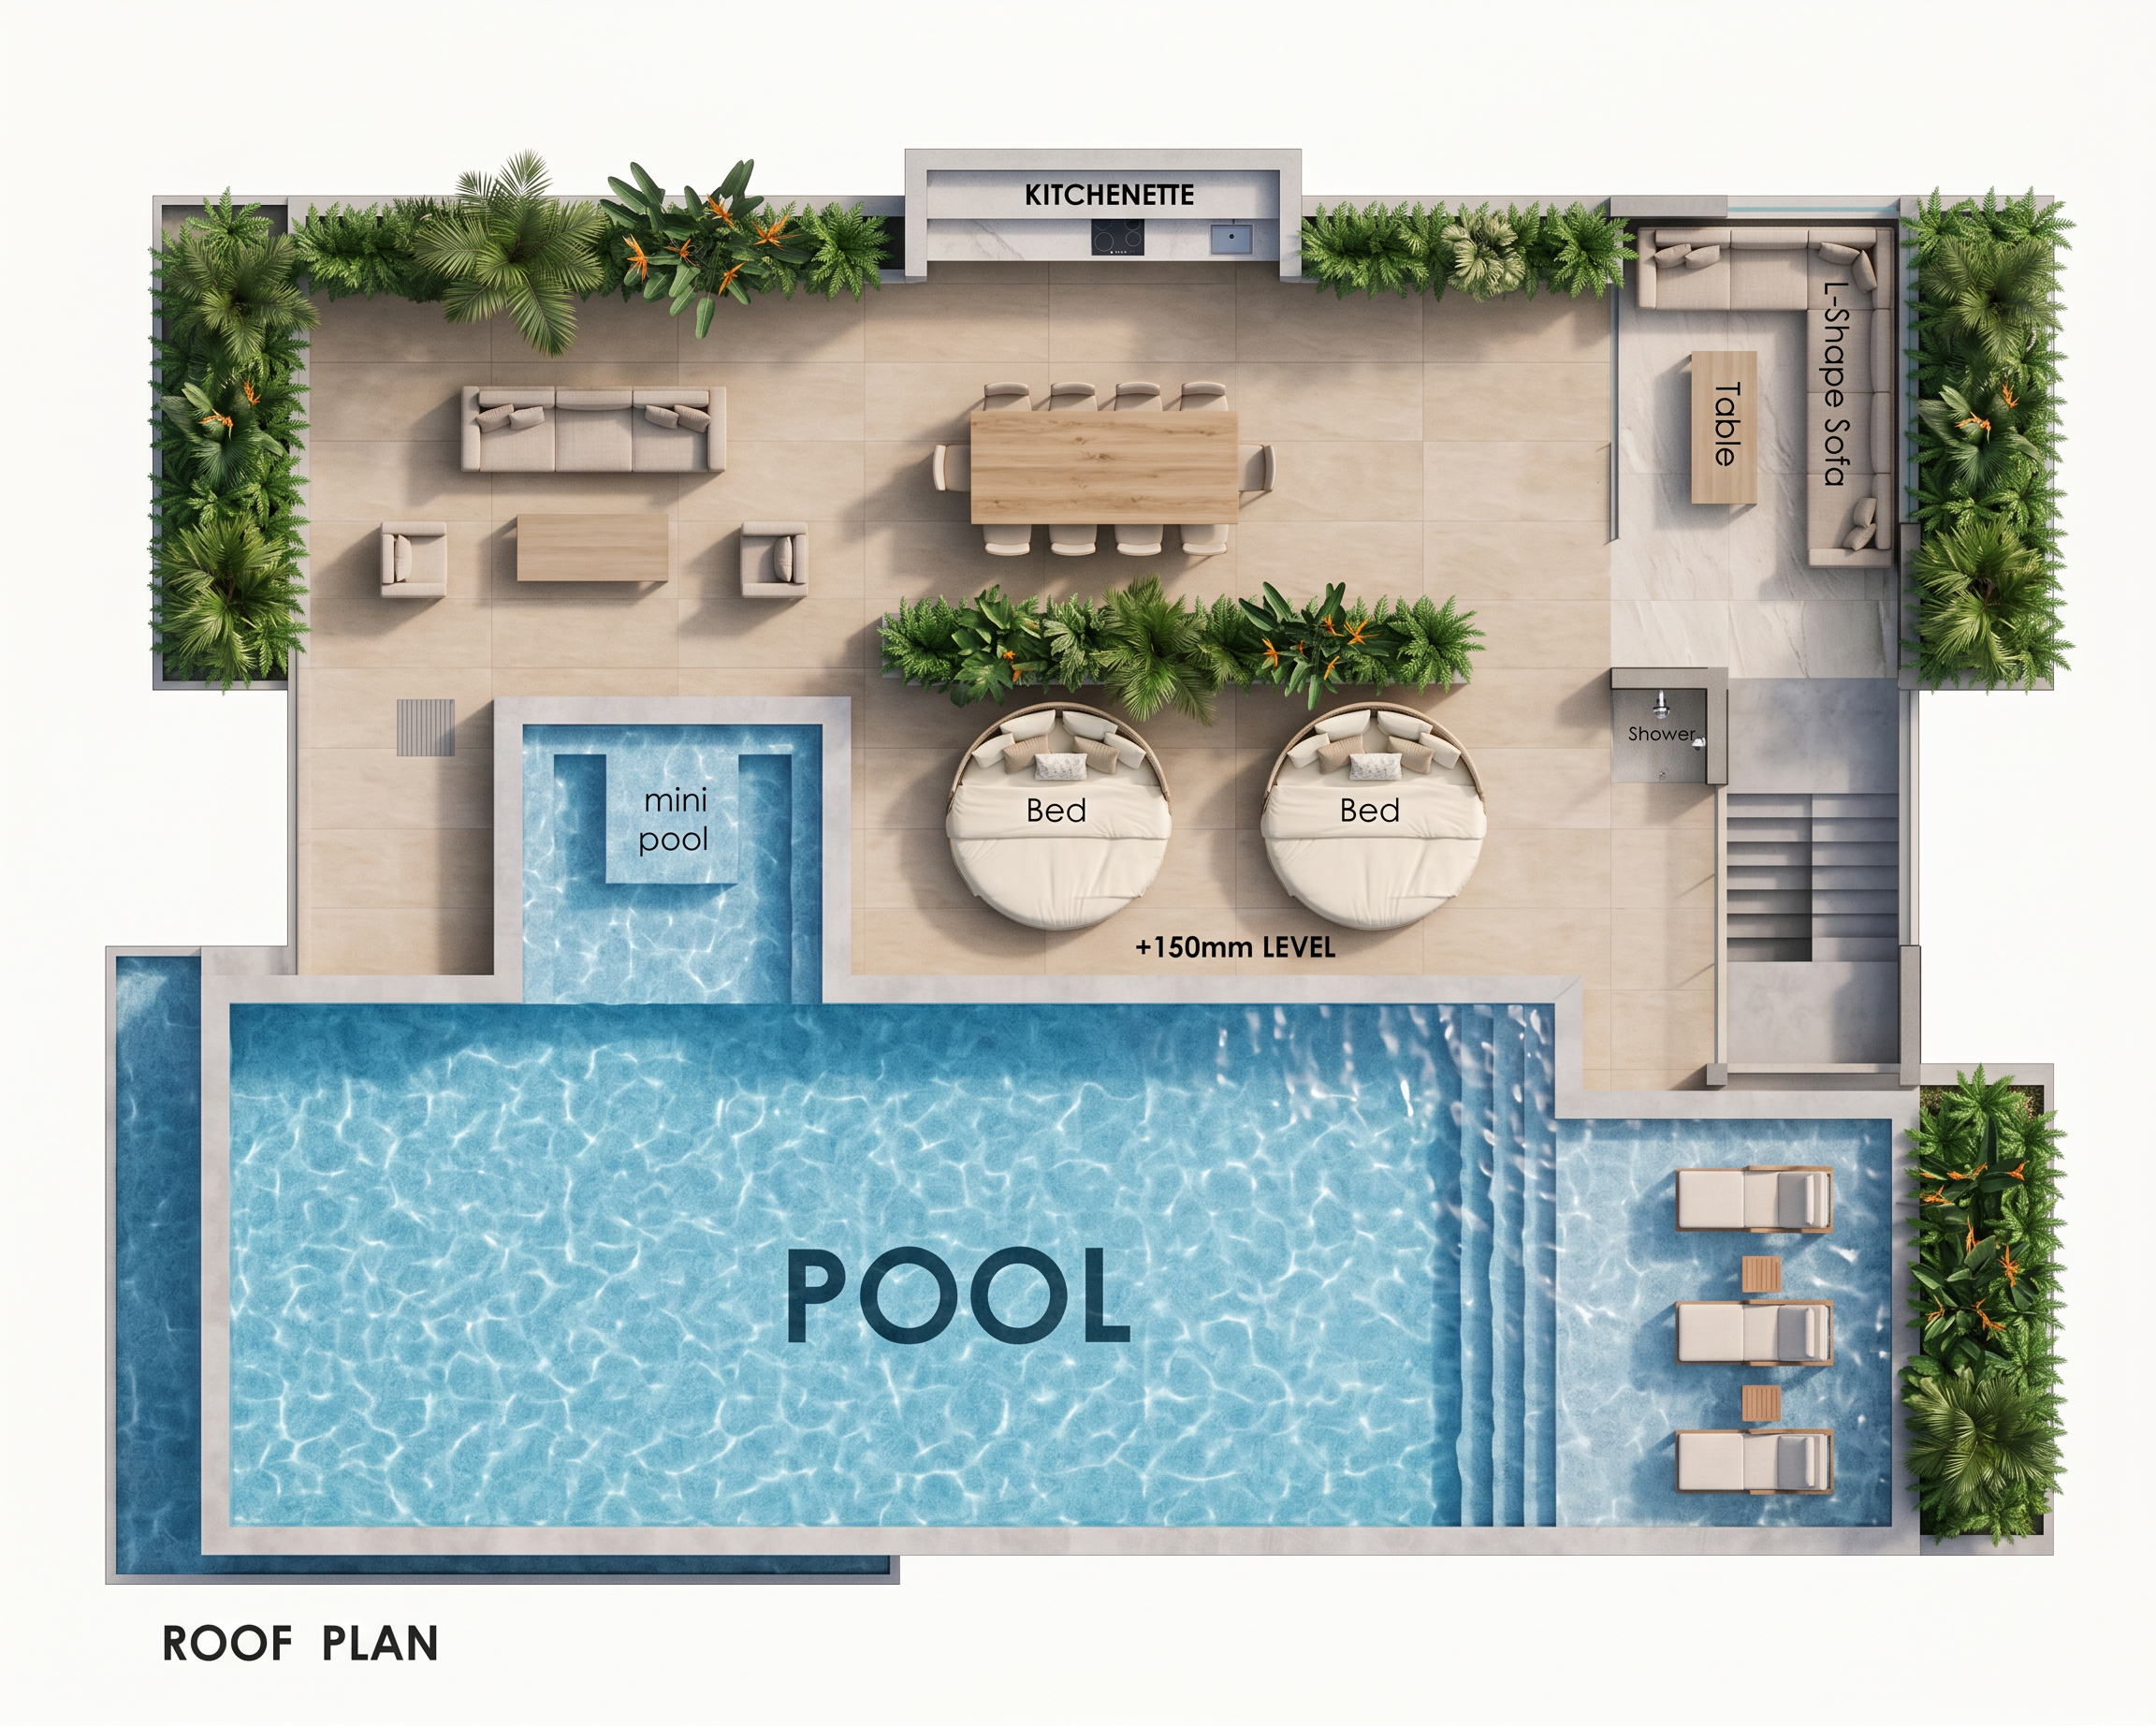
- Create a highly detailed, photorealistic 2D architectural roof-plan render from the provided plan. Maintain the exact layout, proportions, walls, openings, stairs, furniture positions, pool shape, levels, and circulation without changing the architectural design.
Use a clean top-down orthographic view with realistic architectural materials, subtle shadows, and crisp detailing.
Pool: Large rectangular swimming pool occupying from end to end, with realistic blue water, visible water reflections, clean pool coping, and three poolside loungers inside the pool on the right side exactly as shown.
Mini pool: Small raised mini pool/spa at the upper-left of the pool area with realistic blue water and surrounding coping.
Bedroom area: Two circular beds positioned exactly as shown, with realistic bedding and soft neutral colors.
Dining area: Large rectangular dining table with eight chairs, accurately positioned.
Living area: L-shaped sofa at the upper-right with a central rectangular coffee table and realistic upholstery.
Outdoor seating: Two individual lounge chairs in the upper-left living area.
Kitchenette: Clearly defined kitchenette at the top center, retaining its exact position.
Stairs: Preserve the staircase at the right side with realistic steps and subtle shadows.
Shower: Retain the shower enclosure beside the staircase.
Landscape: Add dense, realistic tropical greenery along the perimeter and between outdoor zones, while keeping all planting locations exactly as shown.
Flooring: Use warm beige/light-grey outdoor tiles with subtle natural texture and realistic material variation.
Furniture: Modern minimalist furniture in neutral tones—off-white, beige, light grey, and natural wood.
Lighting: Soft natural daylight with subtle ambient shadows and realistic depth.
Presentation: Clean luxury architectural visualization, highly detailed, sharp edges, realistic materials, professional architectural floor-plan rendering, no perspective distortion.
Important: Do not add, remove, resize, rotate, or reposition any architectural element, furniture, pool, stairs, labels, or landscape shown in the original plan.
Dining Area – Bottom Centre
Preserve the dining area at the bottom-centre portion of the plan.
Show a contemporary rectangular dining table positioned exactly within the designated area.
Use a natural wood or stone tabletop.
Include the dining chairs around the table in the same approximate arrangement shown.
Use upholstered dining chairs in beige/cream or soft neutral tones.
Flooring should coordinate with the living room while visually defining the dining zone.
Kitchen Island – Lower Right/Centre
Preserve the freestanding rectangular kitchen island exactly where shown.
Use a premium white stone/quartz countertop with a warm neutral base.
Add the indicated four bar stools along the side of the island.
Use contemporary upholstered or wood bar stools in neutral tones.
Maintain sufficient circulation space around the island.
Add subtle wooden countertop detailing without changing the island dimensions.
Flooring
Use flooring to clearly blend-in the different zones:
Living/dining: warm natural beige 2400mm x 1200mm tiles flooring.
Bedrooms: warm natural beige 2400mm x 1200mm tiles flooring.
Kitchen: warm natural beige 2400mm x 1200mm tiles flooring.
Bathrooms: light stone-effect porcelain tiles.
Garage: smooth concrete/light-grey tile.
Entrance/circulation: large-format warm neutral porcelain tile.
Maintain clean transitions between different floors
- Created
- August 15, 2026