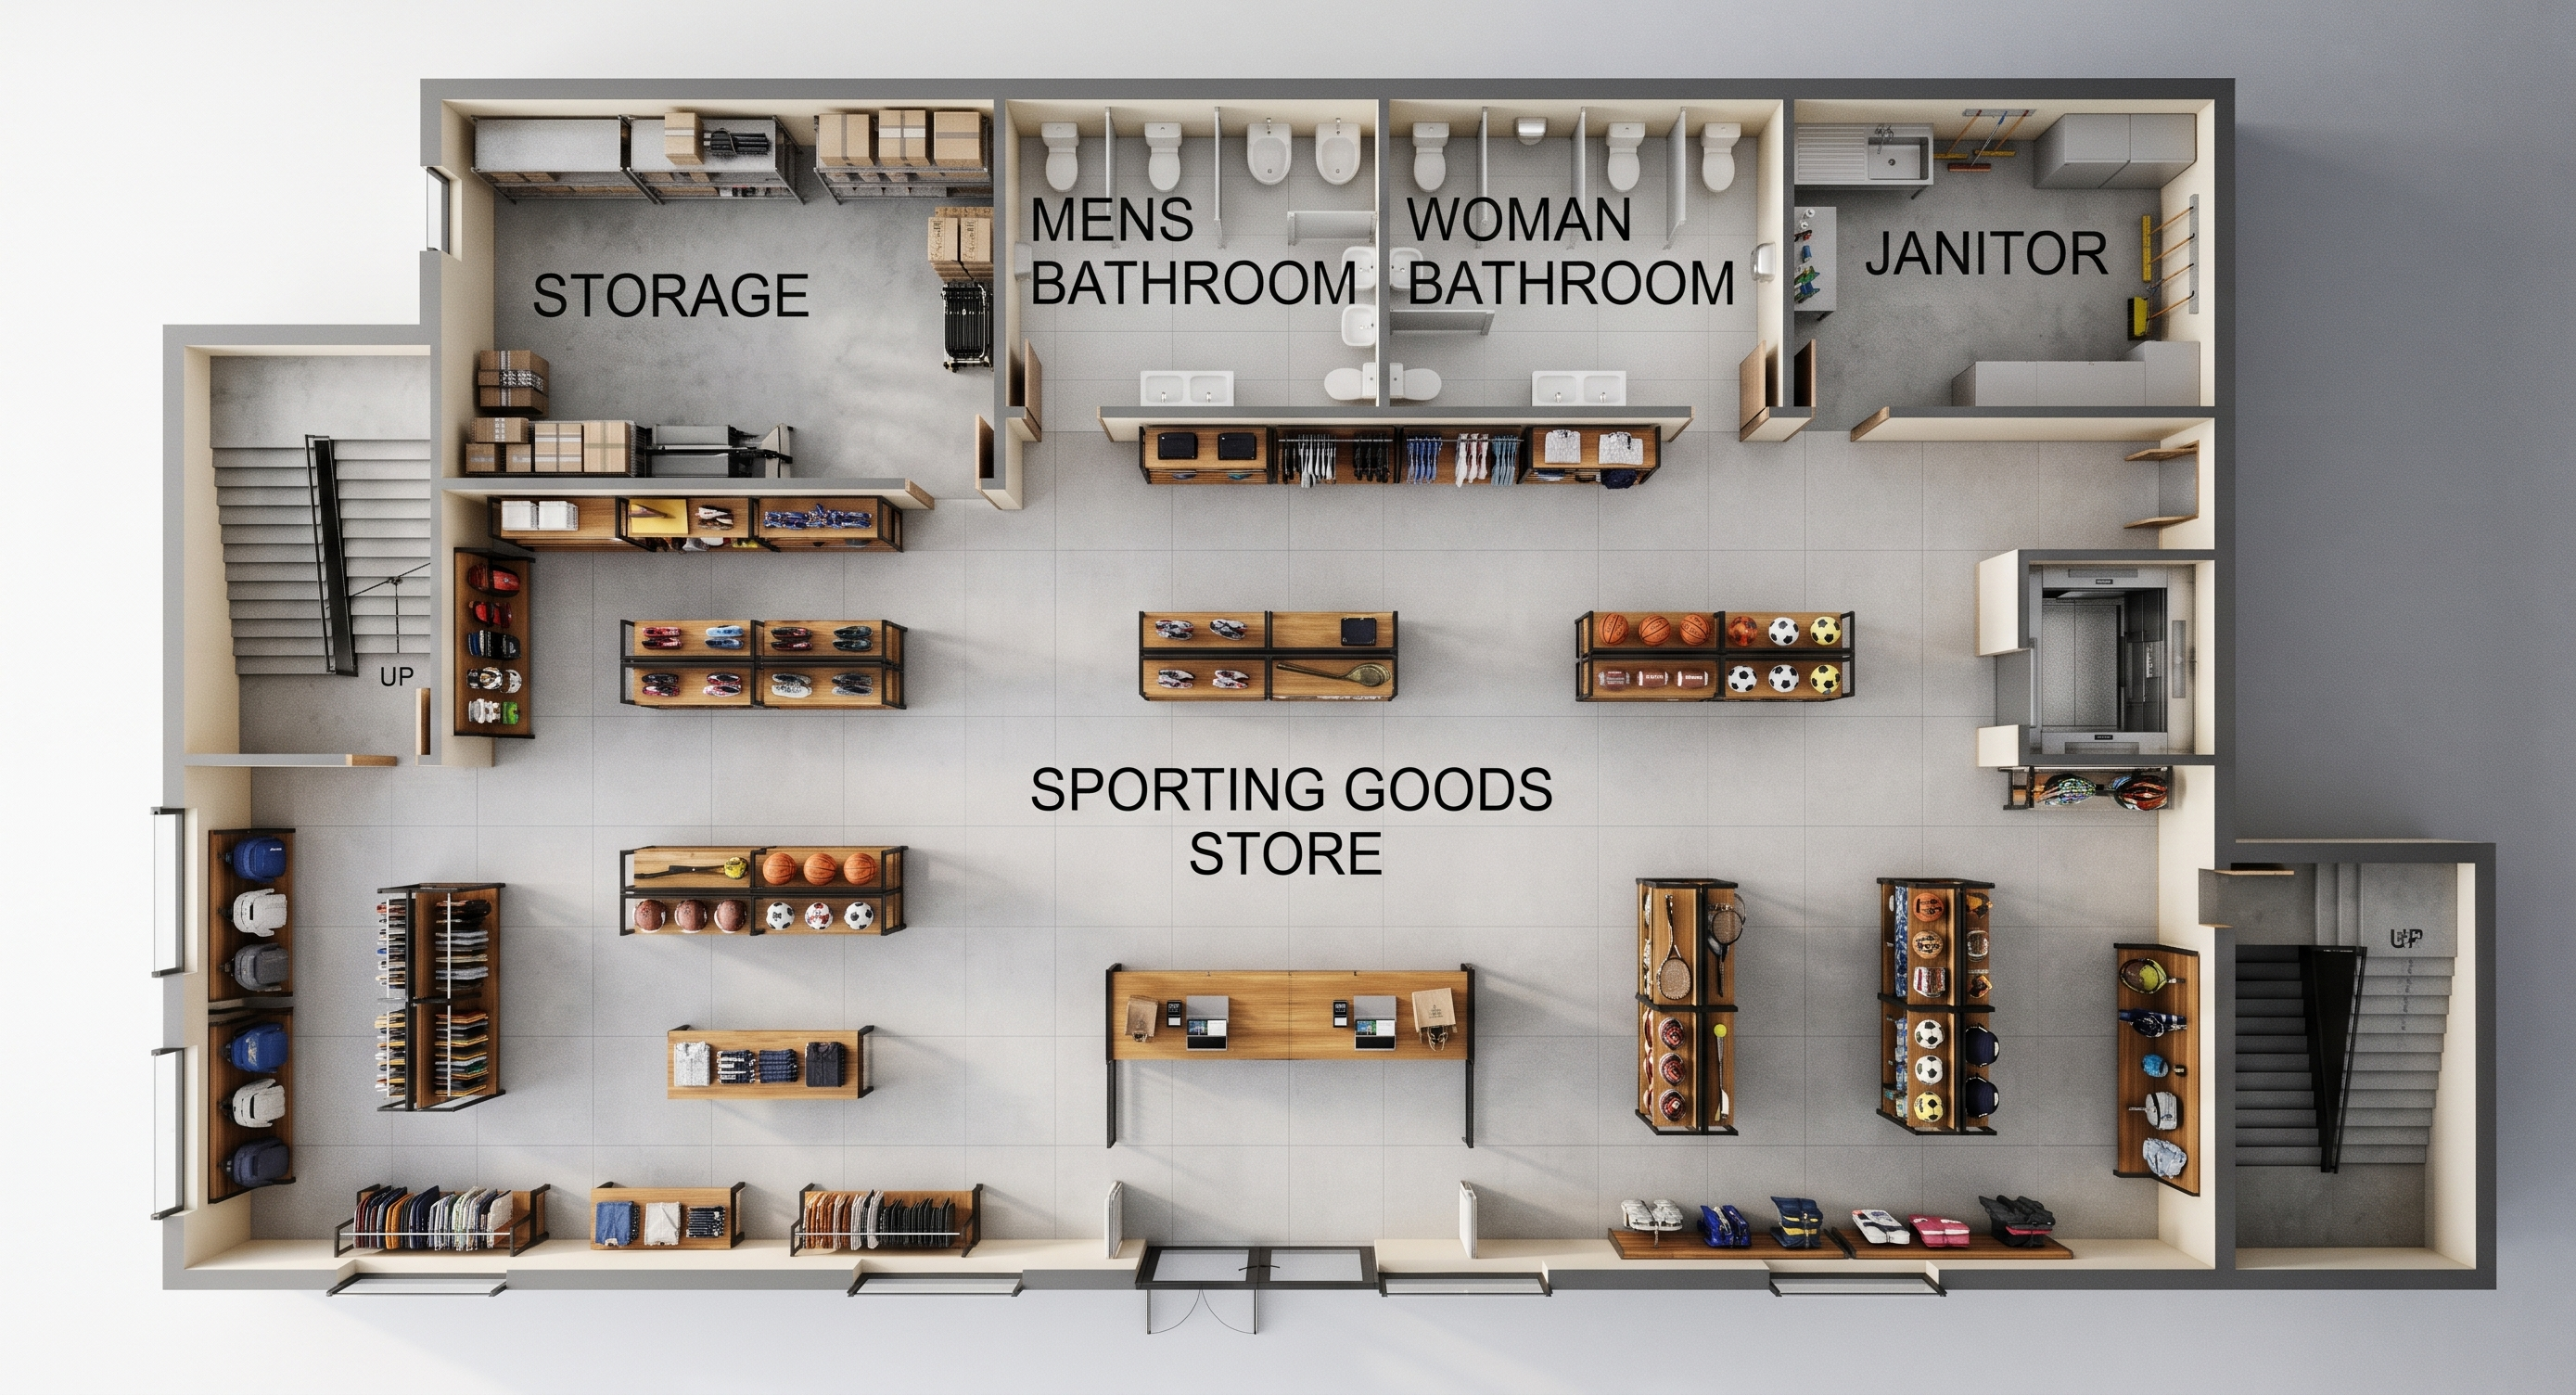
- Prompt
- CRITICAL: Preserve the exact building layout, exterior walls, interior walls, windows, doors, staircases, elevator, entrances, and room dimensions. Do not redesign or modify the building.
SPORTING GOODS RETAIL AREA
Design a modern, organized sporting goods store with appropriately sized retail shelving and merchandise displays.
Include:
Double-sided rectangular merchandise shelving in the central retail area.
Wall-mounted shelving only along solid walls without windows or doors.
Athletic shoes and sportswear displays.
Basketballs, footballs, soccer balls, and baseball equipment.
Tennis rackets, golf clubs, and sporting accessories.
Fitness equipment, backpacks, and outdoor sporting goods.
Clothing racks and organized merchandise displays.
Low display tables where space permits.
Arrange shelving in straight, evenly spaced rows with wide, unobstructed walking aisles. Keep displays appropriately scaled to the building.
SHELVING PLACEMENT — VERY IMPORTANT
DO NOT place shelving in front of ANY windows.
DO NOT place shelving in front of ANY doors.
DO NOT block either staircase.
DO NOT block the elevator or its entrance.
DO NOT block the main front entrance or side exits.
DO NOT place shelving across door swings.
DO NOT place shelving in corridors or required circulation paths.
Keep all storefront glazing visible and unobstructed.
Keep a clear circulation route from the front entrance to the retail area, bathrooms, storage room, staircases, and elevator.
Maintain at least 4-foot-wide main shopping aisles where feasible.
Use freestanding shelving in open retail areas rather than placing displays against windows.
Leave adequate clearance around the checkout counter.
Do not overcrowd the retail floor.
CHECKOUT AREA
Place one rectangular checkout counter near the main front entrance, set back sufficiently to maintain clear entry circulation.
Include two POS registers, card readers, shopping bag storage, and small countertop merchandise displays.
Use warm wood finishes with black metal accents.
STORAGE ROOM — TOP LEFT
Add industrial metal storage shelves, organized inventory boxes, sporting goods stock, and equipment racks. Keep the storage room door and walking paths unobstructed.
MEN'S BATHROOM
Add appropriately sized toilet stalls, urinals with privacy partitions, sinks, mirrors, soap dispensers, hand dryers, and an accessible toilet accommodation.
WOMEN'S BATHROOM
Add toilet stalls, privacy partitions, sinks, mirrors, soap dispensers, hand dryers, and an accessible toilet accommodation. Do not add urinals.
JANITOR ROOM — TOP RIGHT
Add a commercial mop sink, cleaning supply shelves, broom and mop storage, and utility cabinets. Maintain clear access to the door.
MATERIALS AND COLORS
Retail flooring: light gray commercial porcelain tile.
Shelving: black metal frames with warm natural wood shelves.
Checkout: warm wood with a light-colored countertop.
Interior walls: warm off-white.
Bathrooms: light gray tile and white plumbing fixtures.
Storage room: durable gray concrete flooring.
Doors and fixtures: modern commercial finishes.
LIGHTING
Use bright, evenly distributed commercial lighting with realistic materials, subtle shadows, and clearly visible merchandise.
RENDERING
Maintain a perfectly vertical 90-degree overhead architectural view. Show the entire floor plan with realistic, properly scaled furniture, sharp architectural details, and high-resolution textures.
FINAL REQUIREMENTS
Preserve every wall, door, window, staircase, elevator, and room location exactly as shown.
Do not add or remove architectural elements.
Do not block windows, storefront glazing, doors, stairs, elevator access, or circulation routes.
Prioritize safe, accessible circulation over adding more merchandise displays.
Only generate necessary retail furniture, merchandise, bathroom fixtures, storage equipment, materials, and lighting.
- Created
- November 17, 2026