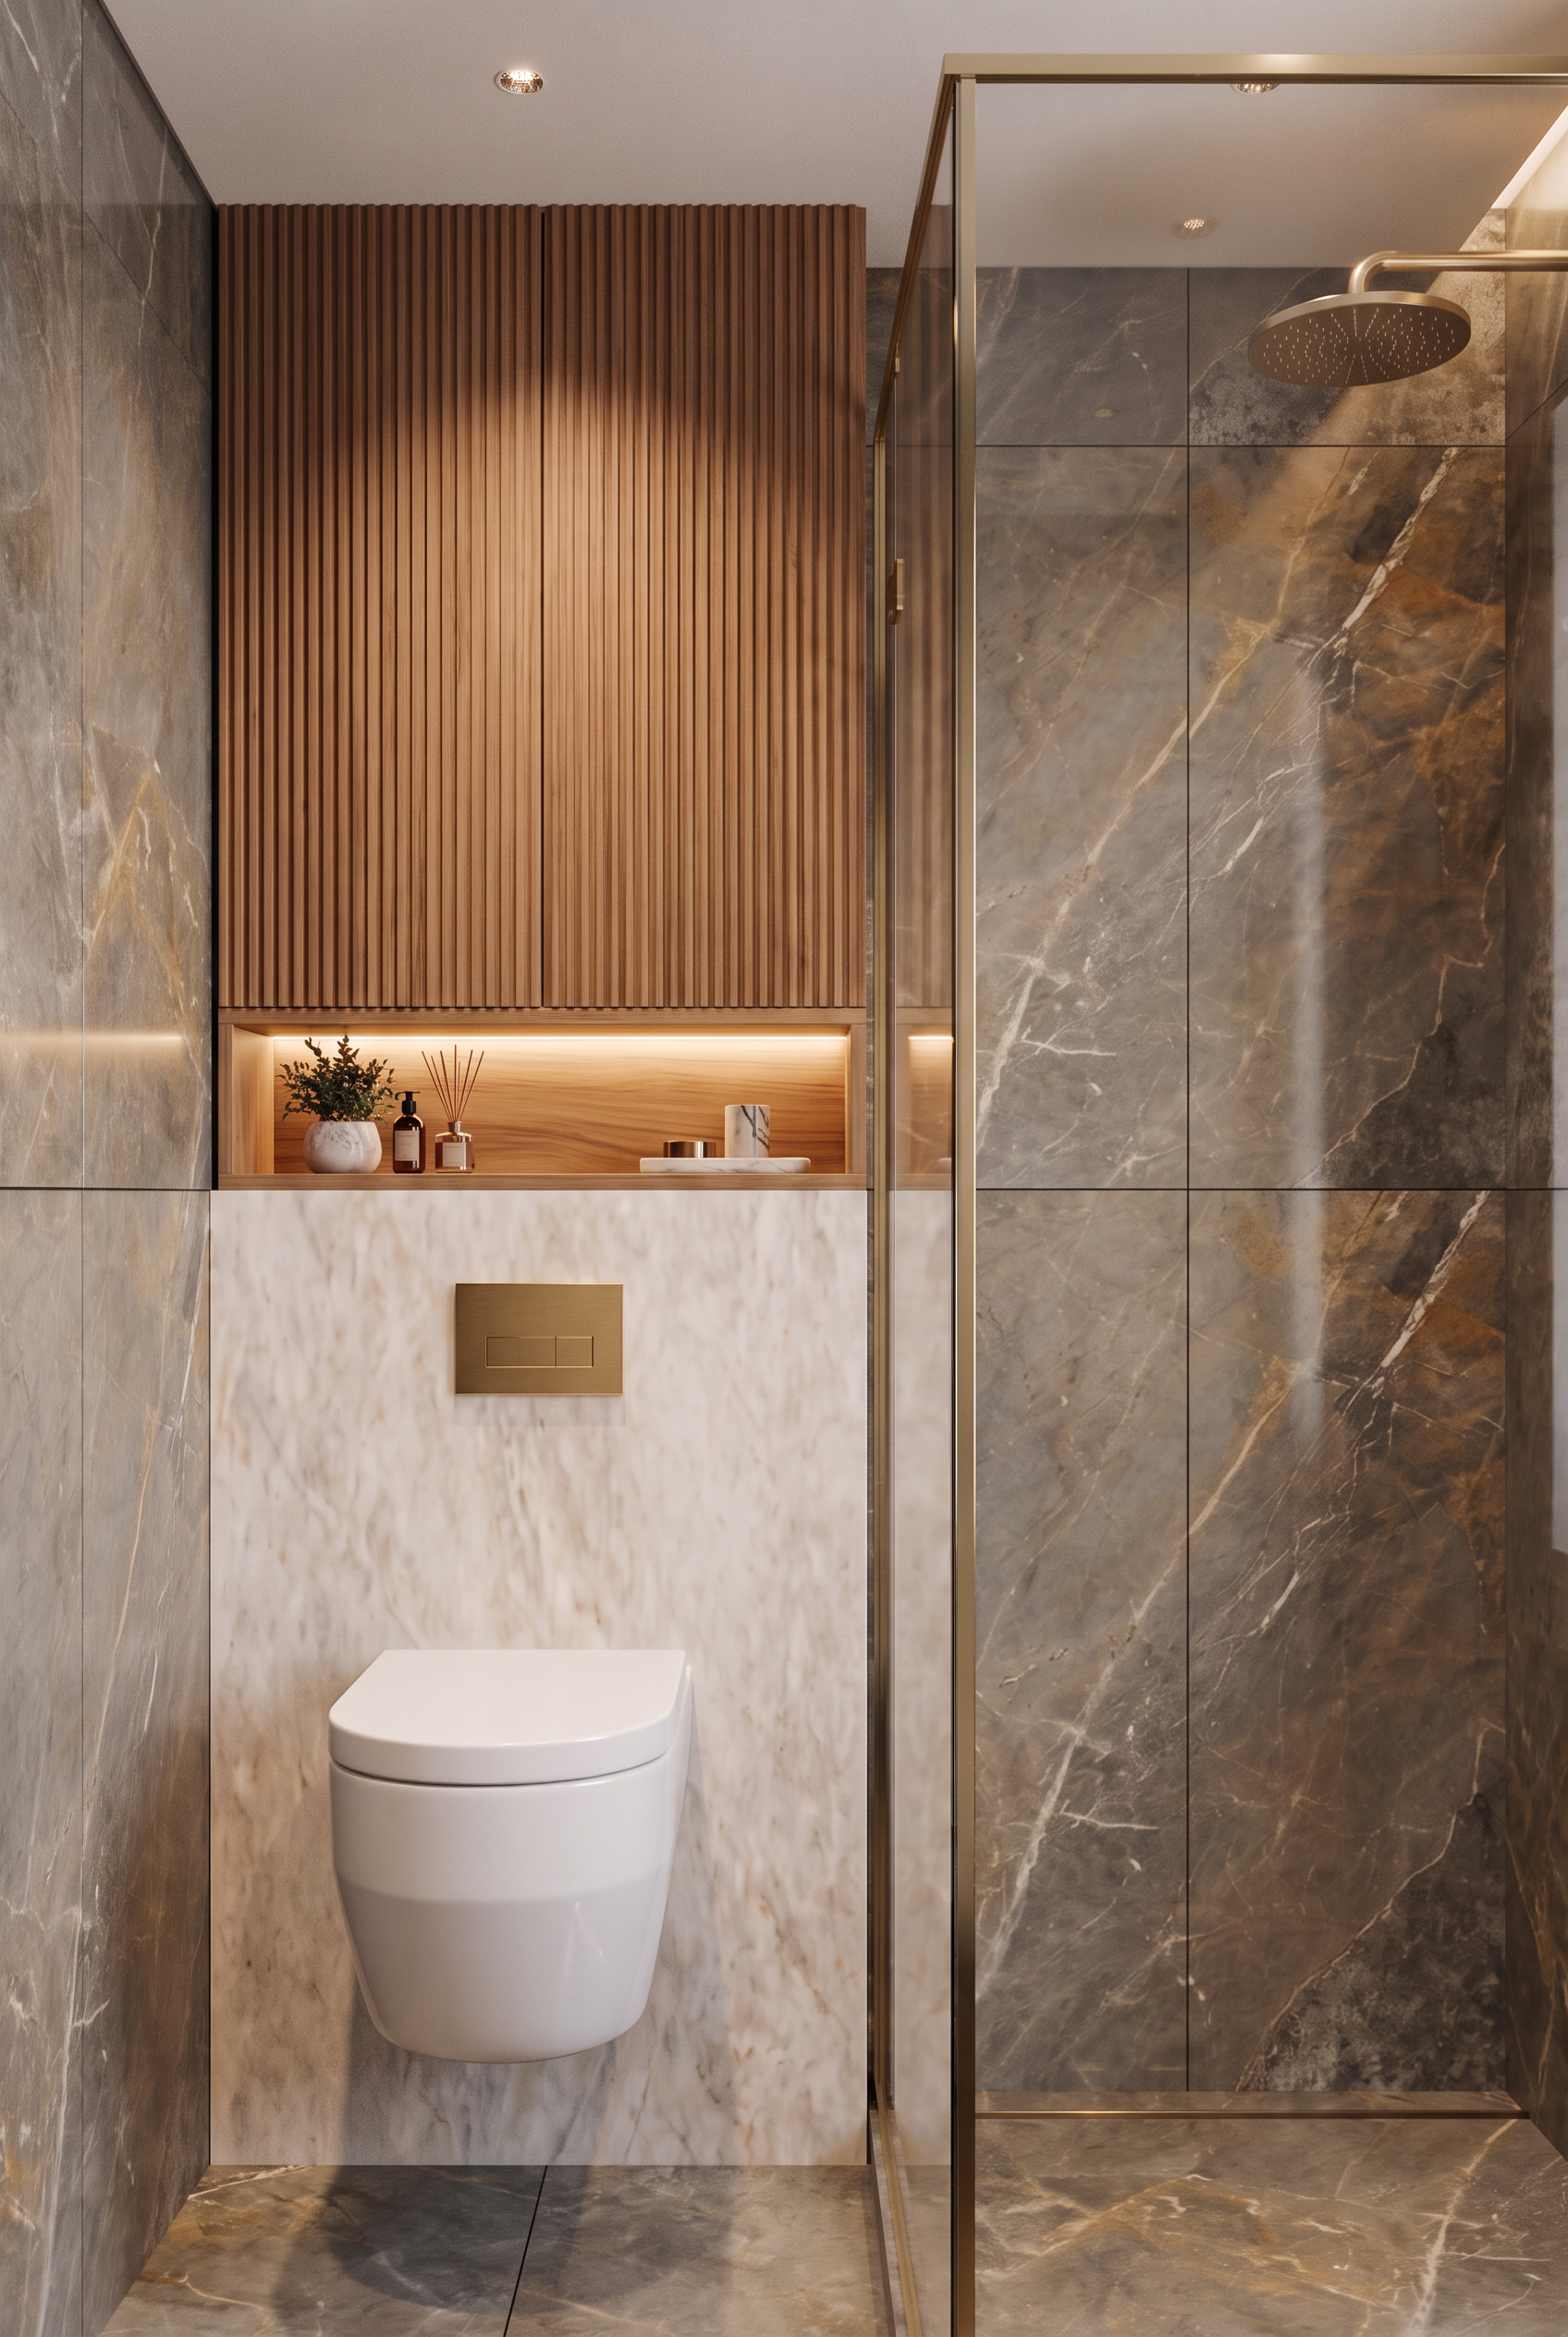
- Prompt
- Make ONLY the specific corrections listed below. Do not change anything else in the existing render.
Keep exactly the same image dimensions, aspect ratio, camera angle, camera position, perspective, geometry, proportions, layout, and overall design.
1. Light marble panel and wooden elements: The light-colored marble panel behind the toilet and all wooden elements below it must end exactly at the shower enclosure boundary. They must NOT extend into or overlap the shower area. Keep these elements entirely outside the shower enclosure, as intended in the original design.
2. Remove unwanted reflection: Remove the reflection/ghost image visible in the current render. There should be no additional reflection or duplicated visual element in this area. Keep the glass shower enclosure realistic and transparent, without creating artificial reflections that alter the appearance of the space.
3. Brown marble color: Replace the existing brown marble with the marble shown in the provided reference. Match the reference marble’s exact shade, color, veining, and overall appearance.
4. Marble tile layout: Divide the brown marble on the floor and inside the shower into individual large-format tiles measuring approximately 60 × 120 cm. Make the tile proportions realistic and consistent with the perspective. Add subtle but clearly visible grout joints between the tiles so that the marble does not appear as one continuous surface or stretched texture.
ABSOLUTELY NO OTHER CHANGES. Preserve all existing furniture, fixtures, wooden finishes, glass enclosure, lighting, geometry, proportions, and design exactly as in the current render. Only apply the corrections specified above.
- Created
- October 30, 2026