- Prompt
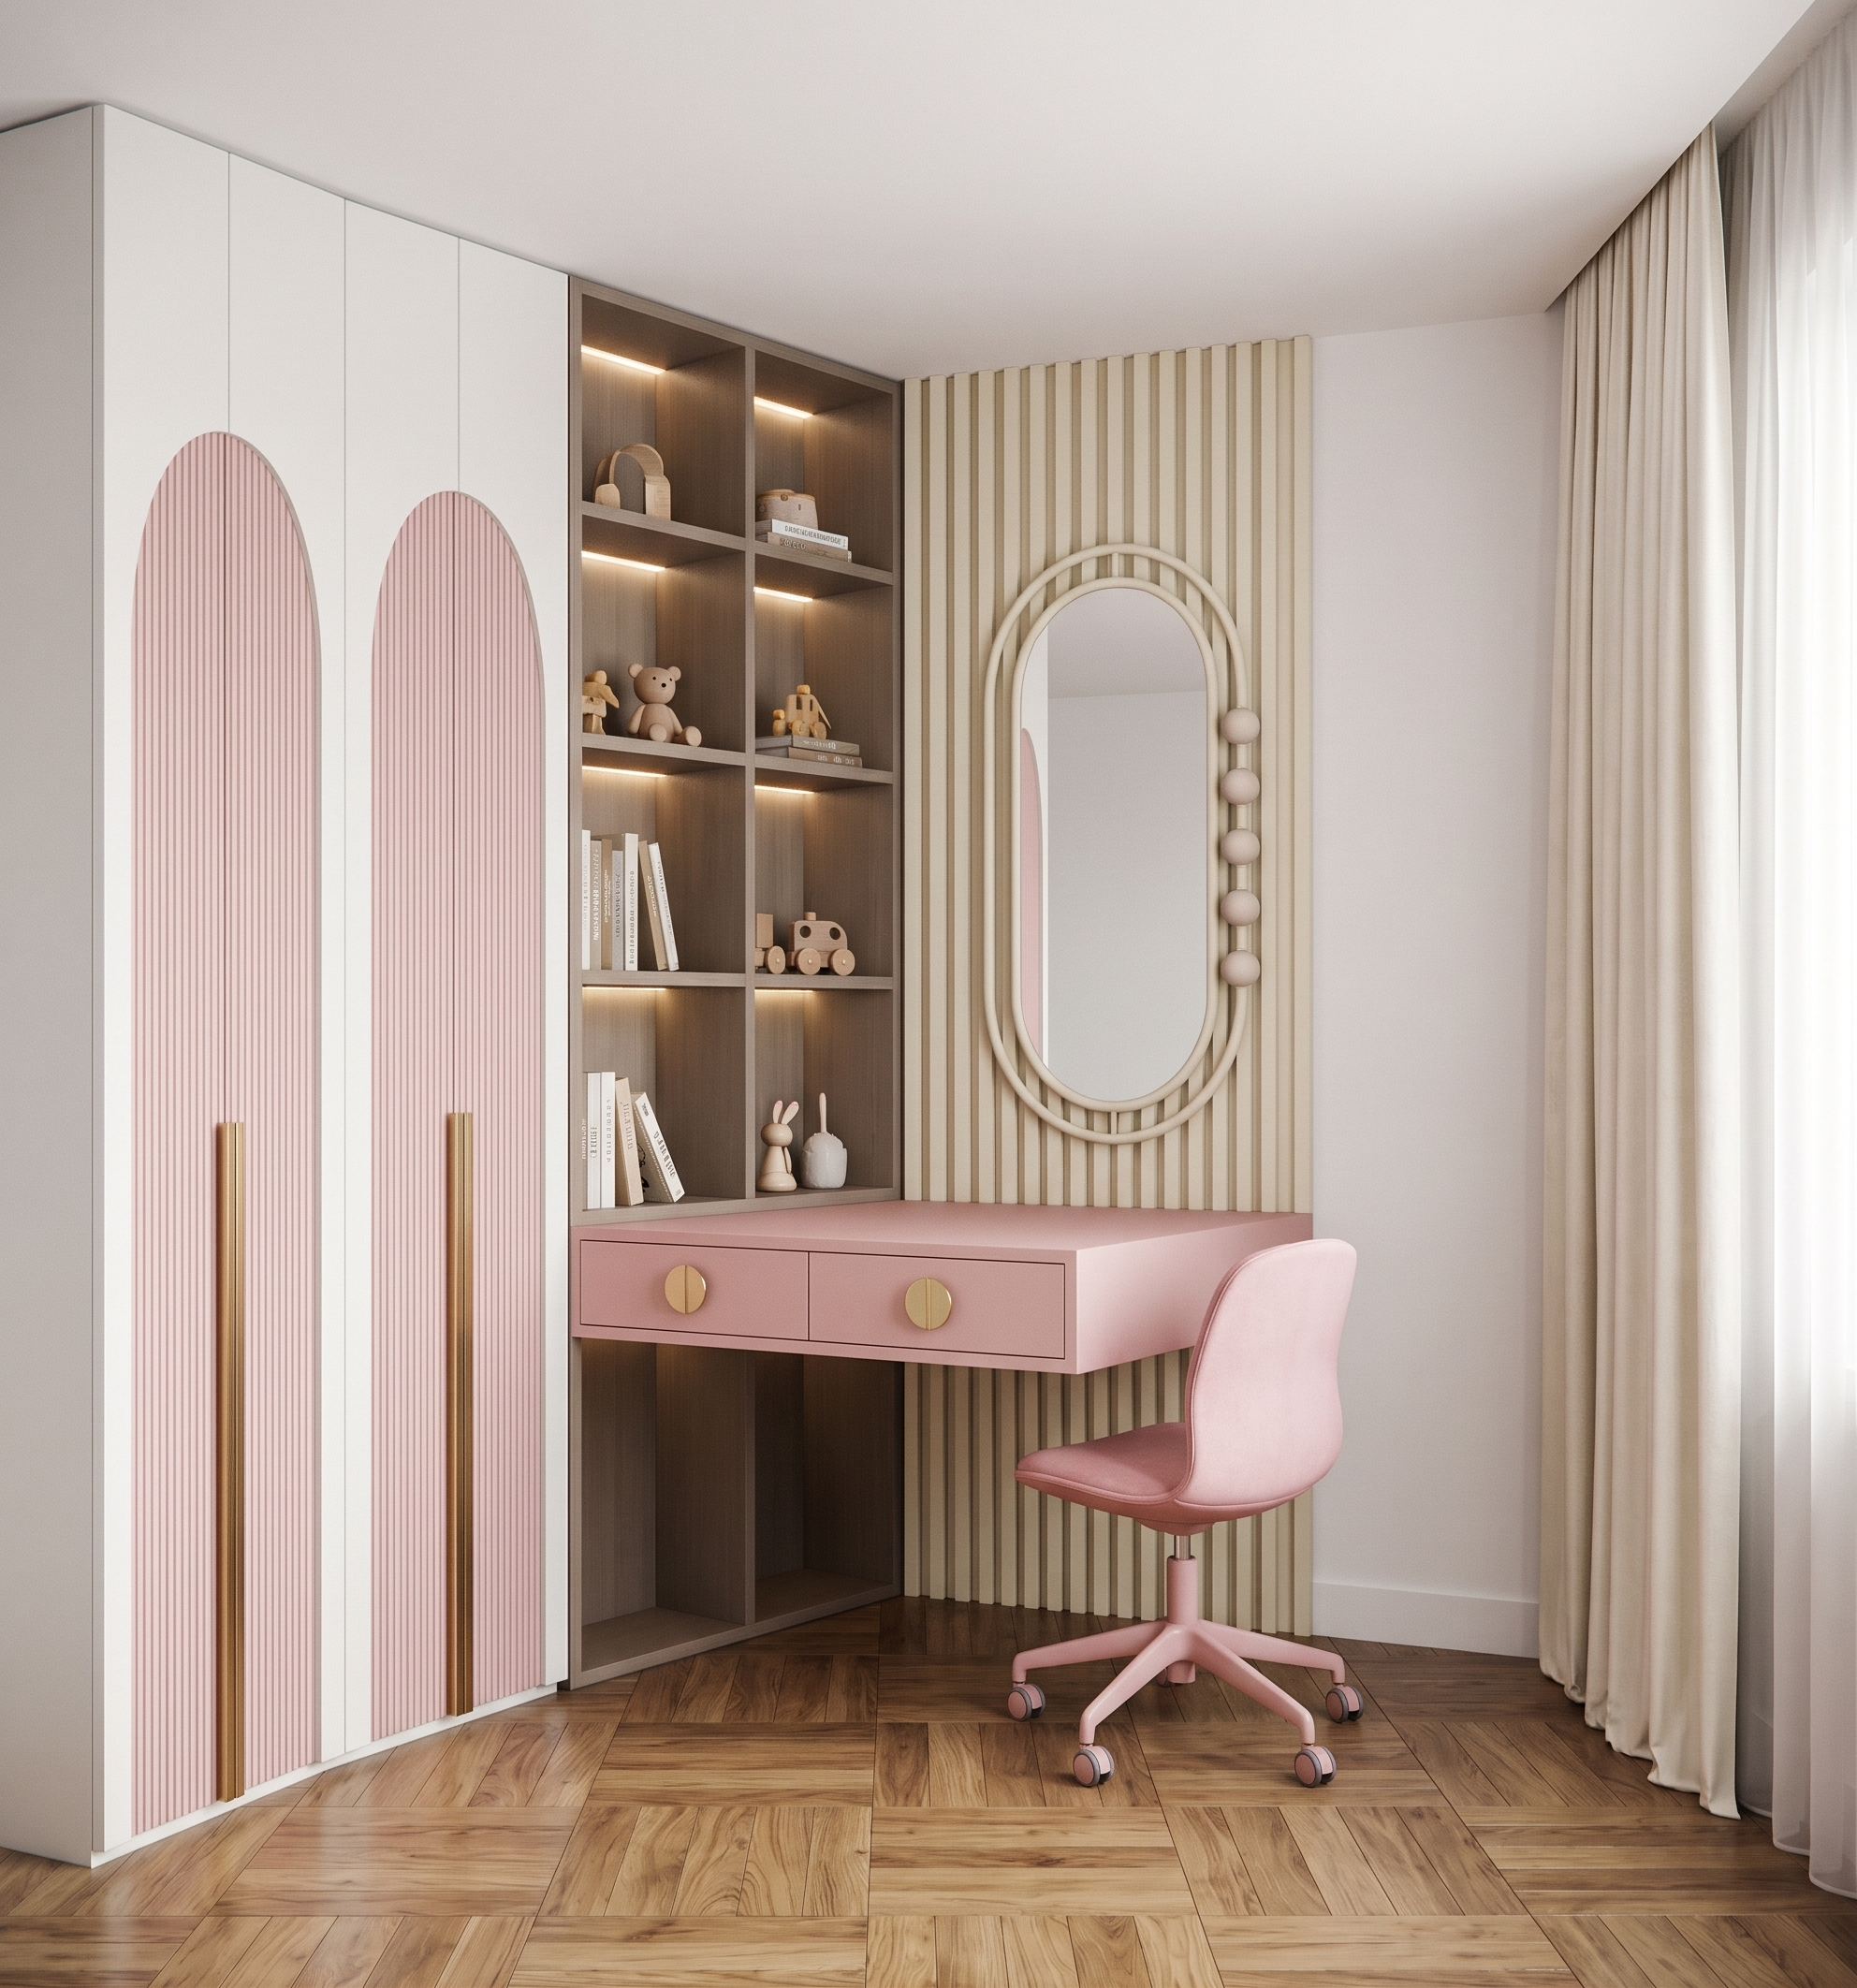
- Create a highly photorealistic, high-end interior render of a children’s bedroom based strictly on the provided 3D model and reference images.
• Do NOT change the image dimensions, resolution, aspect ratio, or crop.
• Do NOT change the camera position, camera angle, perspective, or field of view.
• Do NOT modify, add, remove, or reposition any architectural elements or furniture.
• Strictly preserve the original geometry, proportions, dimensions, layout, and overall design.
• Only apply the specified materials, colors, finishes, lighting, and decorative details.
• All walls should be painted pure white.
• The ceiling should also be pure white.
• Use natural wooden parquet flooring in a neutral, warm, light-to-medium wood tone.
• The tall blue rectangular volume on the left represents a wardrobe. Transform it into a white wardrobe with decorative pink arched inserts, following the exact design language and appearance shown in Reference Image 2.
• Add elegant gold cabinet handles.
• The adjacent brown-colored section represents open shelving. Finish it in a sophisticated neutral brown wood tone.
• Incorporate subtle, warm integrated LED lighting inside the shelves.
• Style the shelves with tasteful children’s bedroom accessories: a few decorative objects, small toys, books, and charming details. Keep the styling elegant, curated, and uncluttered.
• The light green rectangular volume on the perpendicular adjacent wall represents a console dressing table. Transform it into a pink console table, following the design shown in Reference Image 1.
• Reproduce the same decorative details, proportions, and cabinet handles as in Reference Image 1.
• The yellow-marked area behind the console represents decorative wall paneling. Replace it with elegant cream-colored vertical decorative battens/slats, matching the design and finish shown in Reference Image 1.
• Above the console, install a mirror matching the exact shape, frame, and design of the mirror in Reference Image 1.
• Add a stylish pink children’s swivel chair on wheels in front of the console. Ensure it fits naturally into the existing composition without changing the furniture layout.
RIGHT SIDE – WINDOW TREATMENT:
• The remaining white wall on the right should stay white.
• Add elegant, soft fabric curtains along this wall, indicating the continuation of a window just outside the visible camera frame. The curtains should look naturally suspended, with realistic folds and a soft, refined appearance.
IMPORTANT – CORNER LAYOUT AND SPATIAL GEOMETRY:
The entire furniture composition is designed as an L-shaped corner arrangement, positioned in the corner of the room. Strictly preserve the exact spatial geometry and perpendicular relationships between all elements as shown in the original 3D model.
Follow this precise sequence and orientation:
• Along the left wall: first comes the tall blue wardrobe, followed by the brown open shelving unit.
• At the end of the shelving unit: the pink console table extends outward, perpendicular to the shelving unit, creating an L-shaped corner composition.
• On the adjacent perpendicular wall: the cream decorative vertical slat paneling and the mirror are positioned behind the pink console table, following the exact orientation shown in the 3D model.
The wardrobe and open shelving must remain aligned along the first wall, while the console table, decorative slat paneling, and mirror belong to the adjacent perpendicular wall.
Do not flatten this composition into a single straight furniture arrangement. Do not rotate, straighten, realign, or reposition any elements. Do not change the corner configuration or the 90-degree relationship between the two walls and the furniture.
The original 3D model is the absolute reference for all spatial relationships, geometry, dimensions, and positioning. Only change the materials, colors, finishes, lighting, and decorative styling.
- Created
- November 16, 2026