Skip to content
Render tools
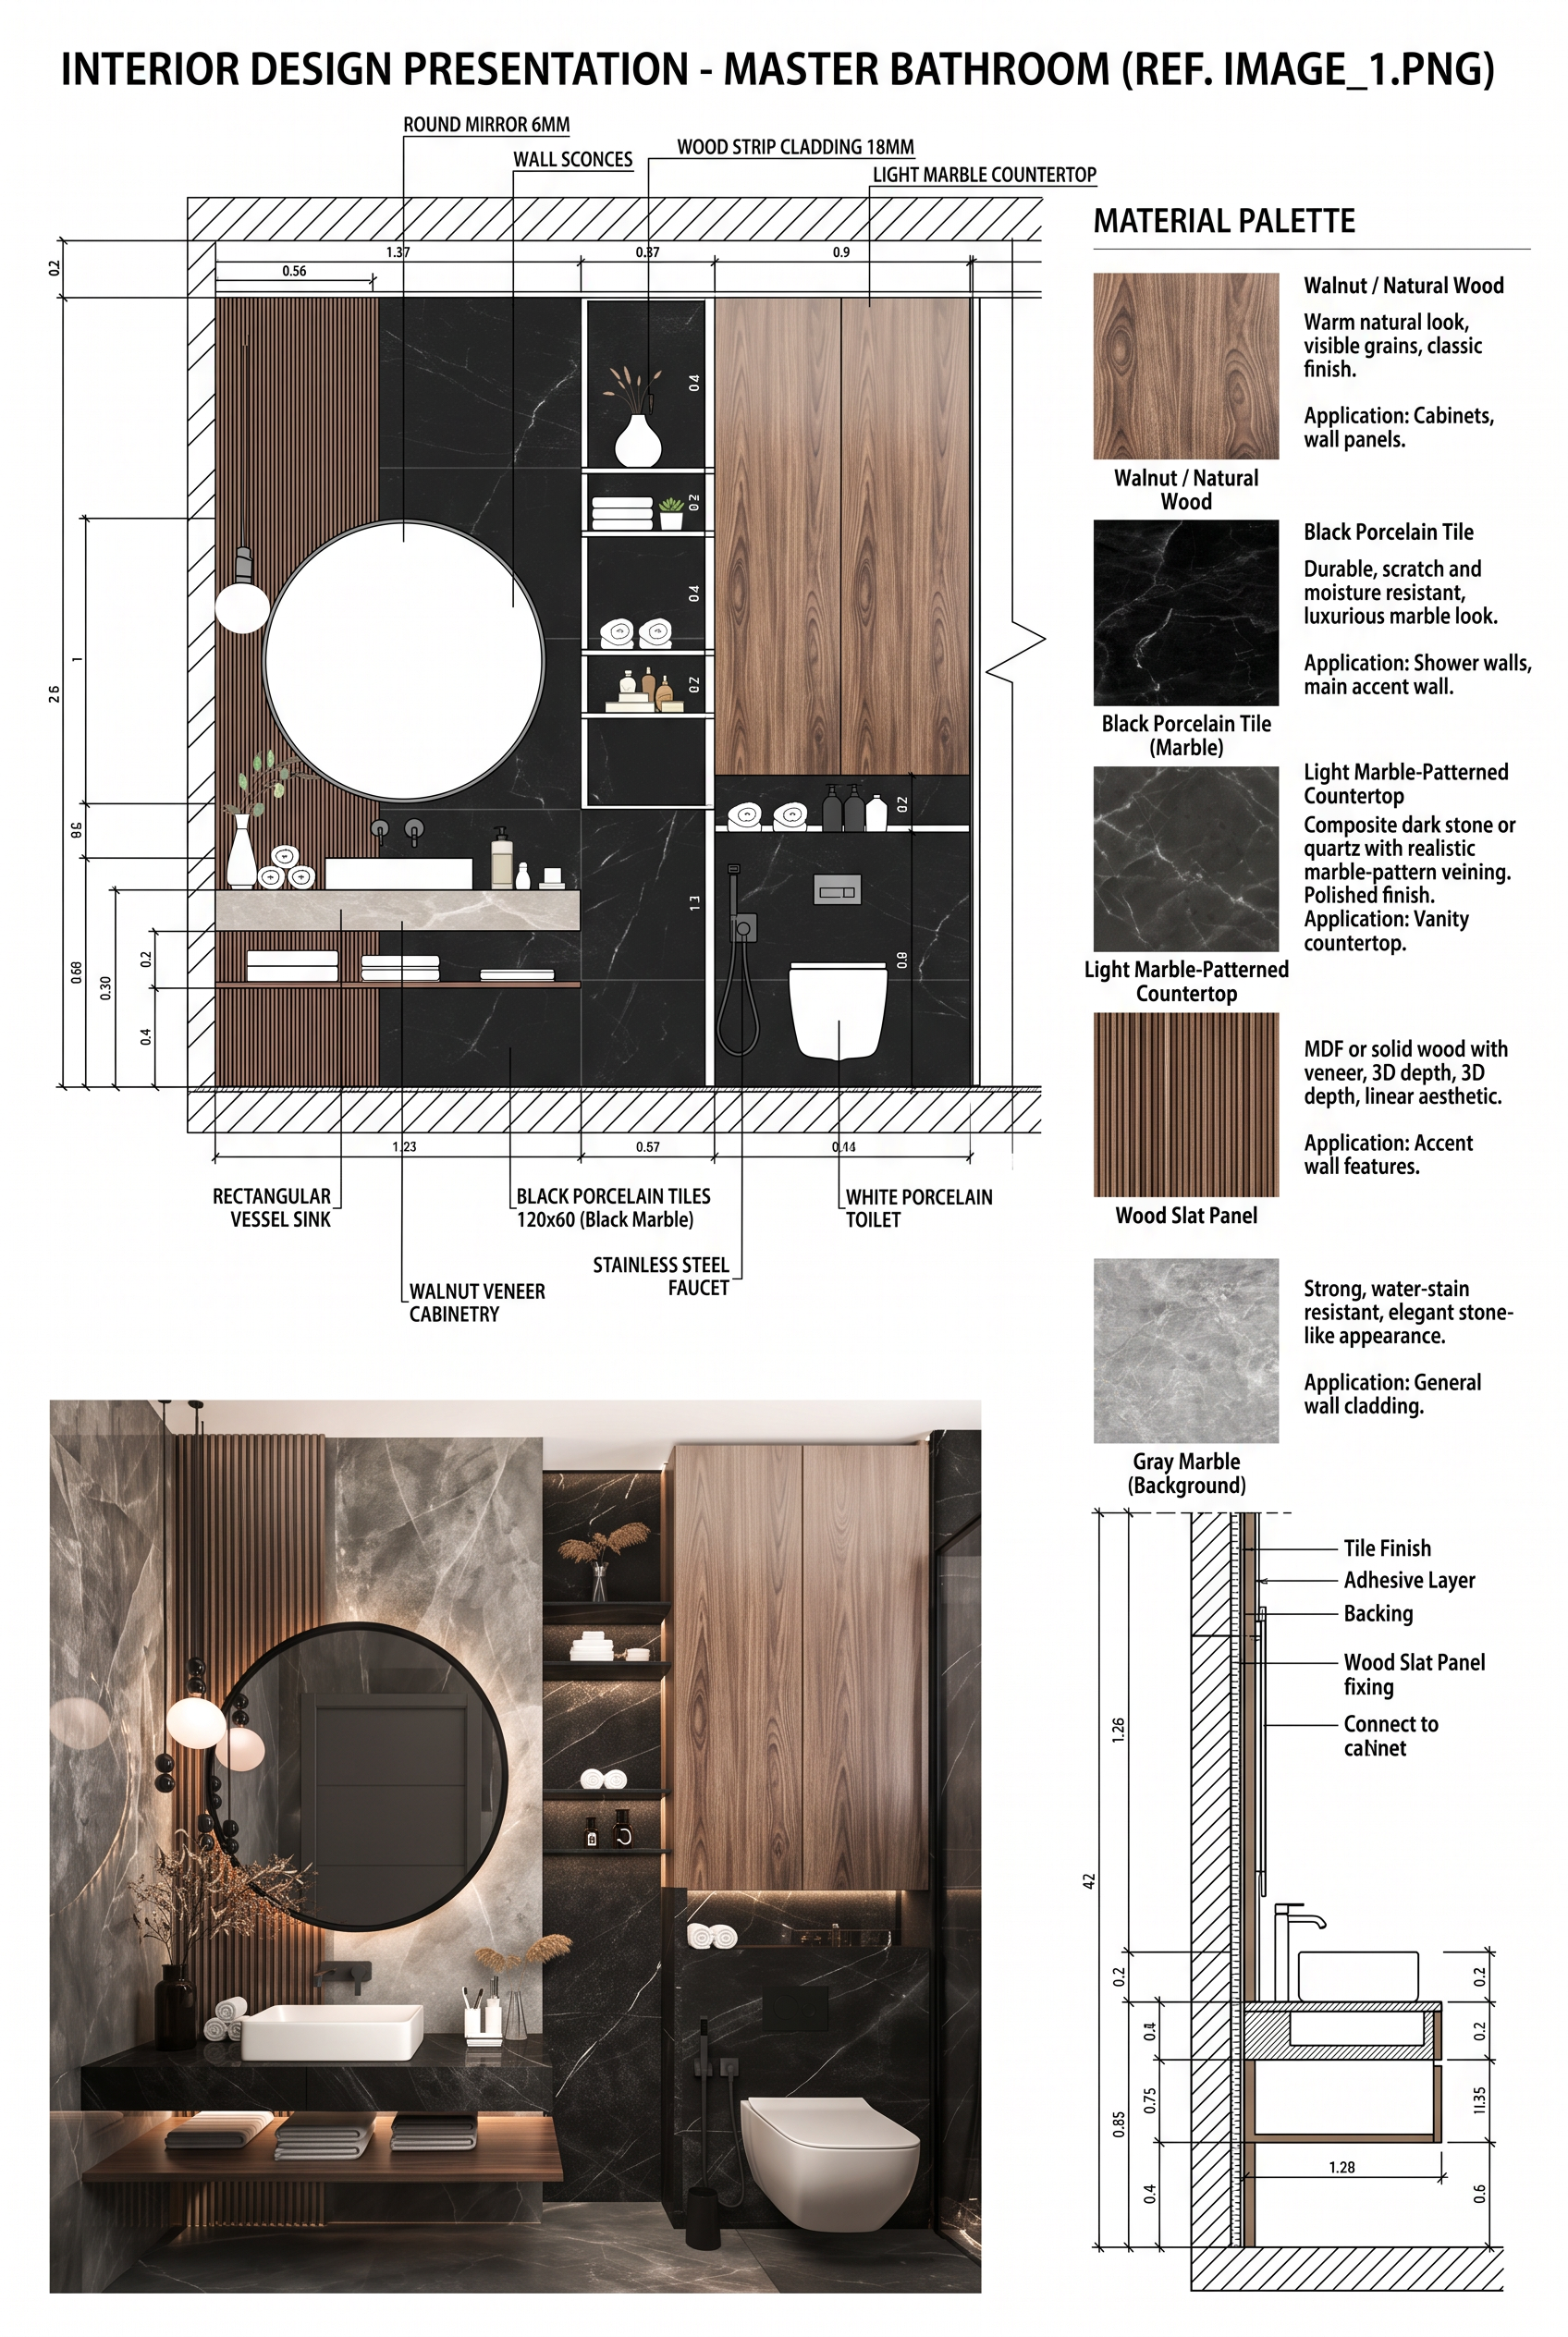
Create a professional architectural interior design mood board based on the uploaded bathroom render.

Use the uploaded render as the PRIMARY and ONLY design reference. Do not redesign the bathroom and do not invent a different interior.

Create a clean vertical architectural presentation board on a white background, similar to a professional interior architecture material board.

LAYOUT:

1. TOP / MAIN AREA:
Create a precise FRONT ELEVATION of the bathroom vanity wall based exactly on the uploaded render.
Show the actual arrangement of:
- vertical wood slat wall
- round mirror
- wall sconces
- vanity cabinet
- countertop
- vessel sink
- faucet
- open shelving
- tall wooden storage cabinets
- black wall tiles
- light gray wall tiles
- toilet and plumbing fixtures where visible

The elevation must be a clean 2D architectural drawing with thin black technical linework, orthographic front view, no perspective and no photorealistic appearance.

Add architectural dimension lines around the elevation and small material/detail callouts.

2. BOTTOM LEFT:
Place one clean photorealistic render of the SAME bathroom from the uploaded reference image.
Do not change the design, furniture, materials, colors or proportions.

3. RIGHT SIDE:
Create a MATERIAL PALETTE extracted directly from the uploaded render.

Show 4–5 rectangular material samples with labels:
- Walnut / Natural Wood
- Black Porcelain Tile
- Light Gray Porcelain Tile
- Wood Slat Panel
- Dark Stone / Countertop Material

Each material sample should look like a real material texture, neatly cropped into a square or rectangular swatch.

4. RIGHT SIDE NEXT TO EACH MATERIAL:
Add short architectural descriptions explaining:
- material type
- approximate finish
- visual character
- durability
- suitable application

5. BOTTOM RIGHT:
Create a detailed 2D ARCHITECTURAL SECTION / WALL DETAIL based on the same bathroom.
Show wall layers, tile finish, wood slat panel, mirror, countertop, vanity cabinet and floor/wall junction.
Use thin black technical drafting lines, section poche/hatching, dimensions and material labels.

GRAPHIC STYLE:

Professional interior architecture presentation board
Minimal architectural graphic design
White background
Black technical linework
Gray and warm wood material tones
Clean grid layout
Precise alignment
Consistent typography
Architectural annotations
Dimension lines
Material callouts
Minimal shadows
High-end architecture portfolio presentation
A2 vertical presentation board
Clean editorial composition

IMPORTANT:
The uploaded render is the ONLY design reference.
Preserve the exact bathroom design and material palette from the render.
Do not add new furniture.
Do not change the vanity configuration.
Do not change the mirror shape.
Do not change the cabinet arrangement.
Do not invent architectural elements.

The final result should look like a professional ARCHITECTURAL MOOD BOARD / MATERIAL BOARD prepared for an interior design presentation, combining:
FRONT ELEVATION + MATERIAL PALETTE + REALISTIC RENDER + ARCHITECTURAL SECTION + MATERIAL DETAILS.

No people.
No unrelated furniture.
No random decorative elements.
No fantasy architecture.
No perspective elevation.
No distorted geometry.
No excessive text.

Create renders like this

Turn any photo, sketch, or floor plan into a photoreal render in seconds.