- Prompt
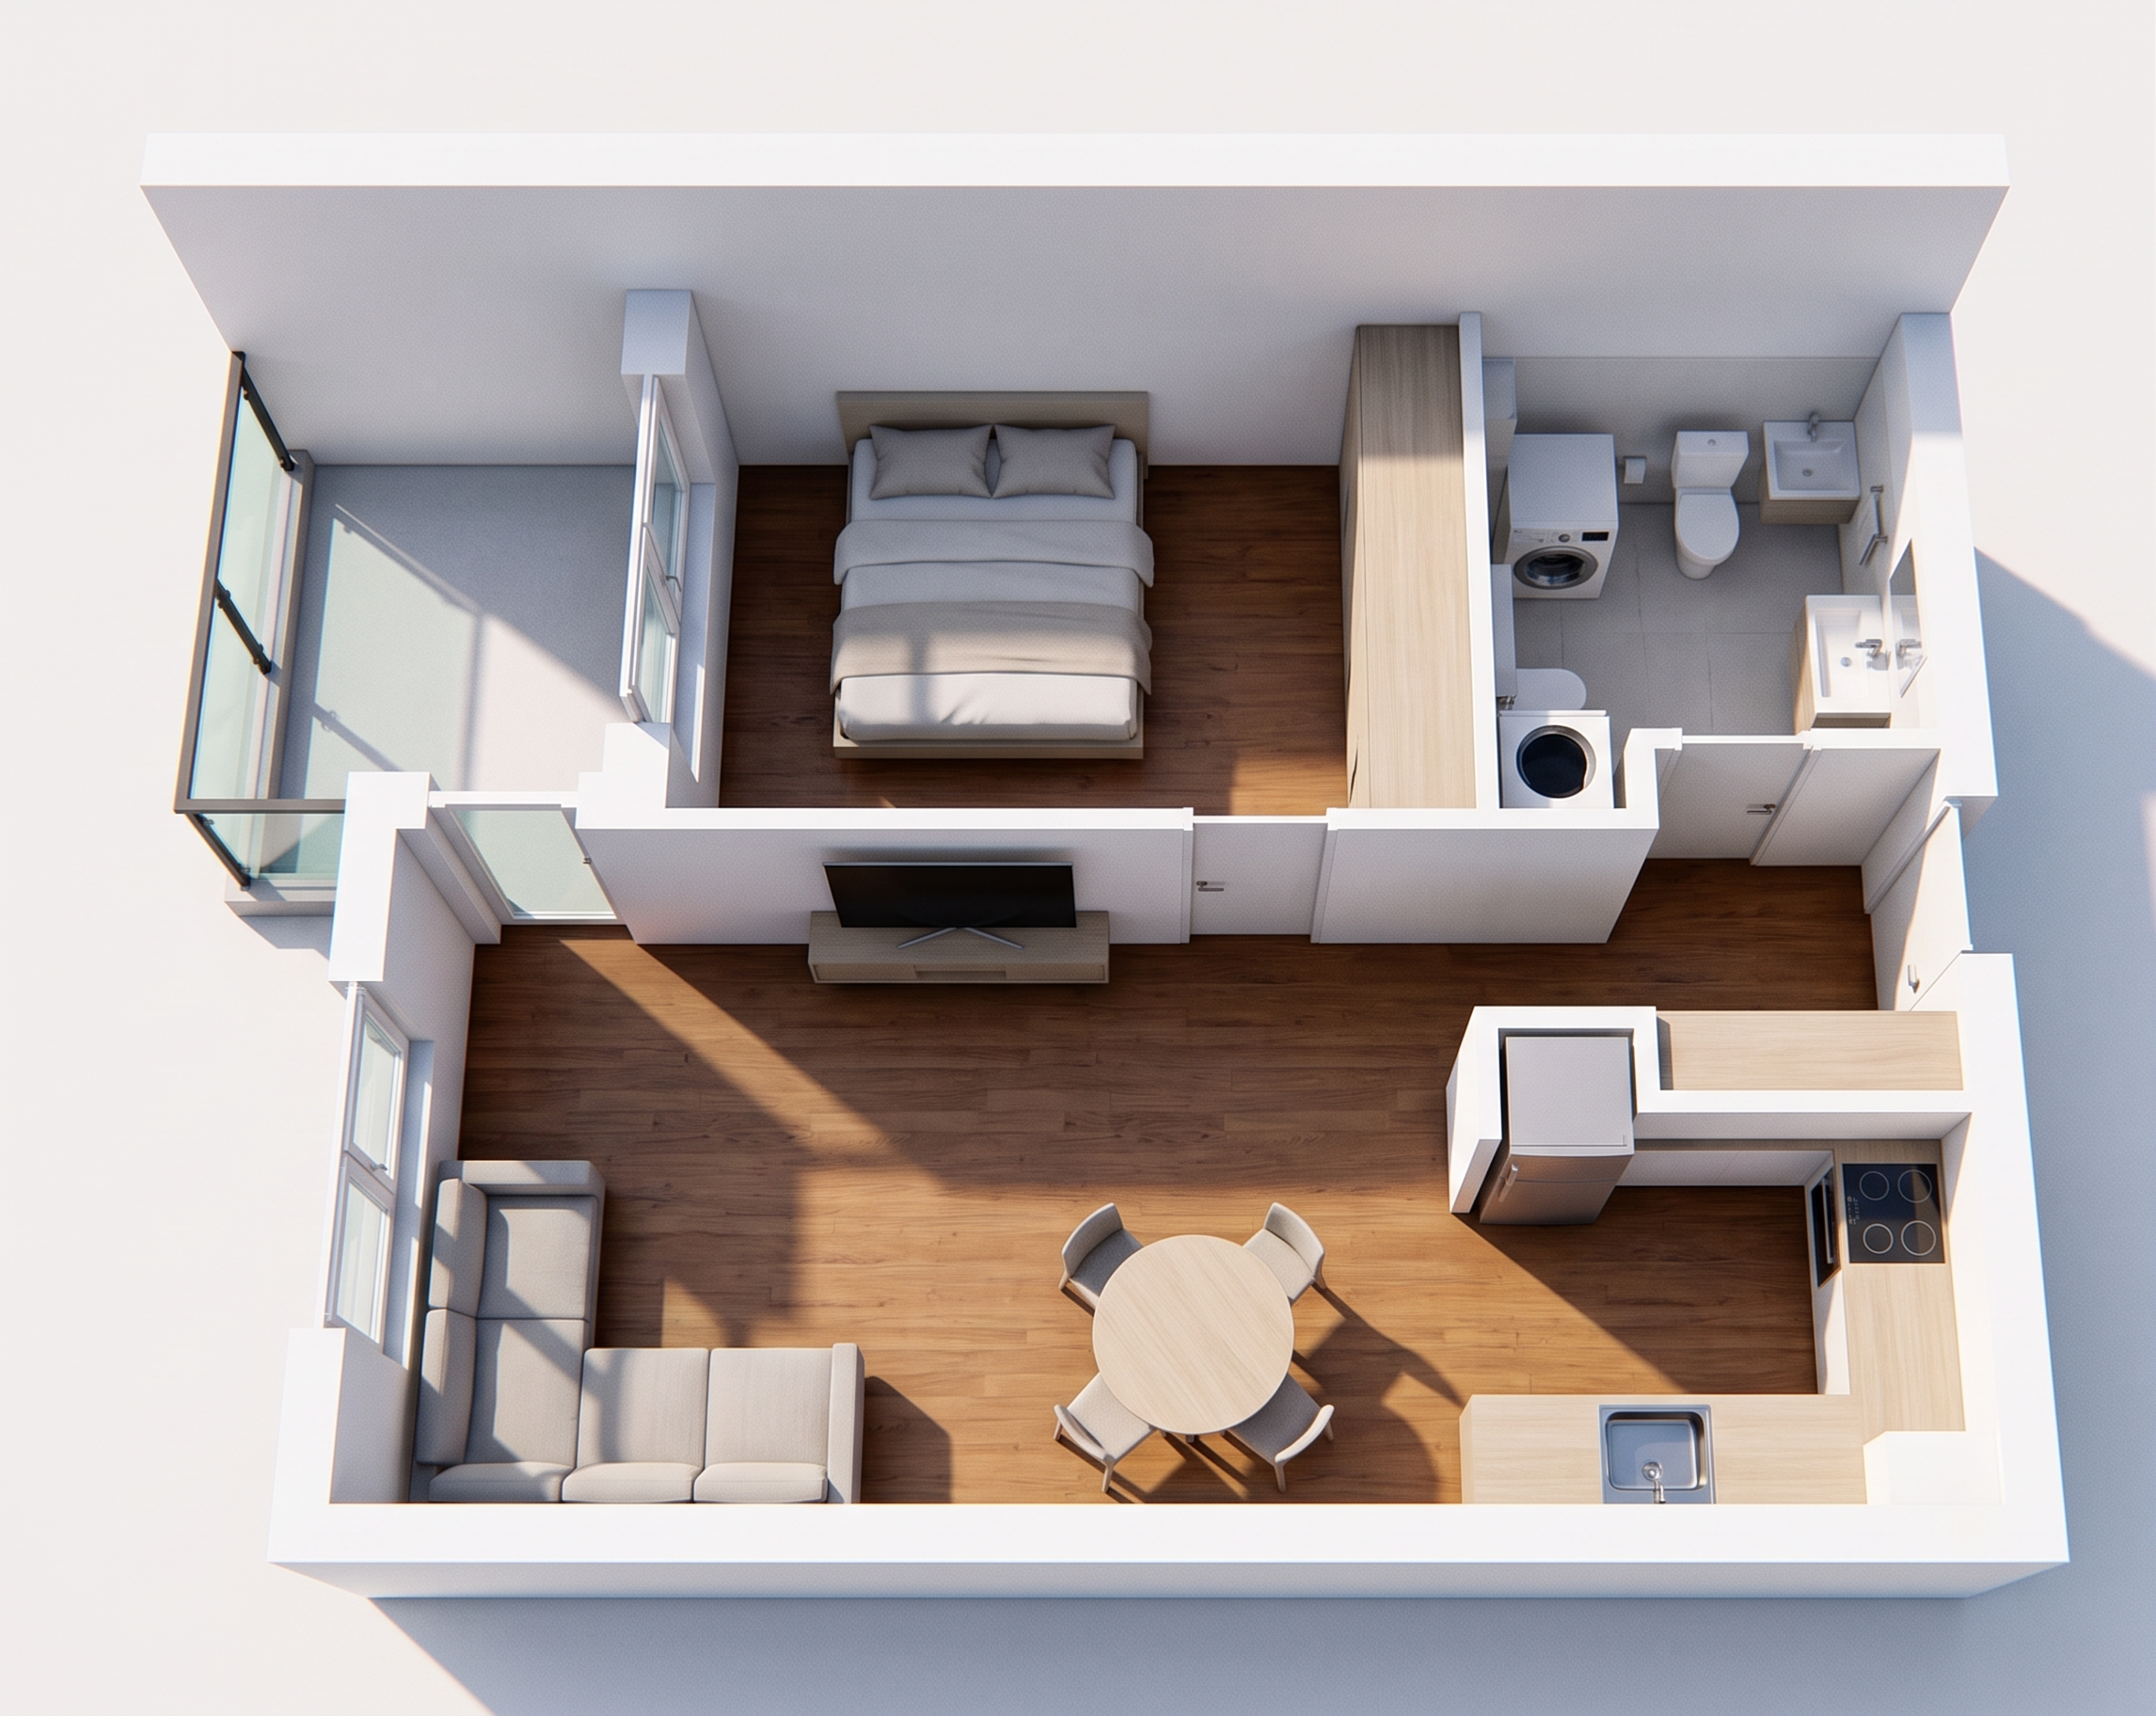
- Create ONE photorealistic furnished cutaway axonometric render of apartment O1/S13 from this annotated floor plan. Preserve its footprint, proportions, walls, openings and furniture positions. This is visualization, not redesign. LEFT, RIGHT, TOP and BOTTOM refer to the uploaded plan. Geometry takes priority over styling.
1. BED AND BEDROOM WINDOW — HIGHEST PRIORITY
In S13.4, put the HEADBOARD AND BOTH PILLOWS at the LEFT end of the bed, beside the terrace-facing wall. The FOOT points RIGHT toward the wardrobe. The bed's long axis runs LEFT TO RIGHT, parallel to the top exterior wall. Follow the original pillow symbols and gold marker. Do not rotate the bed 90 degrees, move its headboard to the TOP wall, or recenter it. Do not add furniture that forces a different bed position.
The bedroom's LEFT opening toward terrace S13.6 is a TWO-LEAF WINDOW ABOVE A SOLID MASONRY PARAPET. Keep an opaque wall from floor to window sill; glazing starts ABOVE the sill. Use a low headboard below that sill. This is NOT a door, passage or floor-to-ceiling glazing. There is NO bedroom access to the terrace. Keep the masonry below this window visible in the cutaway.
2. TERRACE AND EXTERIOR WALLS
Keep S13.6 only within the small TOP-LEFT rectangle. Its TOP exterior edge is a SOLID WALL. Its LEFT exterior edge has ONE STRAIGHT GLASS BALUSTRADE with anthracite posts and handrail. Do not wrap glass railing around the top edge. Terrace access is from the LIVING ROOM through the existing glazed door at the terrace's BOTTOM edge. Keep its drawn position. Do not extend the terrace along the living-room facade.
Keep the TOP/REAR and BOTTOM/FRONT exterior walls solid: NO windows or doors there. Preserve the existing living-room window on the LEFT facade and the entrance door on the RIGHT. Add no exterior openings.
3. ROOM AND FURNITURE LAYOUT
Keep bedroom S13.4 upper-center, bathroom S13.5 upper-right, entrance S13.1 right, living/dining S13.3 below, kitchen S13.2 lower-right. Keep the wardrobe at the bedroom's right side. Preserve internal door positions; add no partitions.
Keep the L-shaped sofa lower-left, the round dining table and chairs in their drawn positions, and the TV against the living/bedroom partition. Preserve the kitchen configuration: refrigerator at its upper-left end, cooktop on the right-hand run, sink on the bottom run.
In the bathroom's LOWER-LEFT corner, the circle inside a square is a WASHING MACHINE, NOT a shower tray or enclosure. Put the washing machine there. Preserve the toilet, washbasin and other sanitary equipment at the locations shown. Add no duplicate fixtures.
4. VIEW AND FINISH
Use an elevated FRONT-FACING axonometric view: front edge horizontal, top of plan at the back. Show the entire apartment with a margin around it. Remove roof and ceiling. Lower foreground walls and obstructing internal partitions only for visibility, without moving them or adding openings. Cut window frames consistently where walls are cut, but retain the bedroom window's masonry base. Keep rear walls taller.
White walls, warm wood floors, restrained neutral furniture, realistic glass, soft daylight, plain light background. Follow the layout even where a different arrangement would look more symmetrical.
OUTPUT ONLY THE FURNISHED 3D APARTMENT. All source labels and colored marks are instructions, not decoration. Omit ALL text, room names, codes, dimensions, arrows, colored guide lines, legends, titles and borders.
- Created
- September 12, 2026